Google Pay Per Click Cost Estimator

What is the Google Pay Per Click Cost Estimator: A Comprehensive Guide A 2 Z Complete Info

What is the Google Pay Per Click Cost Estimator: A Comprehensive Guide A 2 Z Complete Info The Google Pay Per Click Cost Estimator, often referred to as the PPC cost estimator, is a valuable tool for businesses and advertisers to gauge the potential costs of their PPC campaigns on the Google Ads platform. In this comprehensive guide, we will delve into the intricacies of the Google PPC Cost Estimator, exploring its significance, how it works, and how to make the most of it for your online advertising campaigns. In the digital age, businesses are constantly seeking ways to increase their online presence and drive traffic to their websites. Google Pay Per Click (PPC) advertising is one of the most effective methods to achieve this goal. However, before diving headfirst into a PPC campaign, it’s crucial to understand the financial aspect. This is where the Google Pay Per Click Cost Estimator comes into play. let’s know firstly Google Pay Per Click What is Google Pay Per Click? Before we delve into the intricacies of the PPC Cost Estimator, let’s start with the basics. Google Pay Per Click (PPC) is an online advertising model that allows advertisers to display their ads on Google’s search engine results pages (SERPs) and other platforms within the Google Ads network. Advertisers pay a fee every time a user clicks on their ad, hence the term “Pay Per Click.” The effectiveness of PPC advertising lies in its ability to target specific keywords and demographics, ensuring that your ads are displayed to a relevant audience actively searching for products or services related to your business. The Role of Google Ads Google Ads, formerly known as Google AdWords, is the platform through which businesses create and manage their PPC campaigns. It provides a comprehensive suite of tools and features to help advertisers reach their target audience effectively. Within Google Ads, the Google Pay Per Click Cost Estimator tool plays a significant role in campaign planning and budgeting. What is the Google Pay Per Click Cost Estimator? The Google Pay Per Click Cost Estimator is a tool provided by Google Ads to help advertisers estimate the potential costs of running a PPC campaign. It offers insights into the expected CPC (Cost Per Click), daily budget recommendations, and keyword bid suggestions based on your chosen keywords and targeting options. This tool is invaluable for advertisers because it allows them to plan their budgets more effectively and make data-driven decisions before launching a campaign. It helps answer critical questions like: How much should I budget for my PPC campaign? What keywords should I target to achieve my advertising goals? What is the estimated cost per click for my chosen keywords? How Does the Google Pay Per Click Cost Estimator Work? The Google Pay Per Click Cost Estimator works by analyzing historical data and competition for the keywords you intend to target in your PPC campaign. It considers various factors, including keyword relevance, competition, and bid amounts, to provide you with estimates. Here’s a step-by-step breakdown of how it operates: a. Keyword Selection: To use the PPC Cost Estimator, you first need to select the keywords you plan to target in your campaign. These keywords should be relevant to your business and the products or services you offer. b. Geographic Targeting: You can specify the geographic locations where you want your ads to be displayed. This helps in estimating costs based on regional variations in keyword competition and user behavior. c. Daily Budget: The tool allows you to set your daily budget, which is the maximum amount you’re willing to spend on your PPC campaign each day. d. Estimations: Once you’ve inputted your keywords, geographic targeting, and daily budget, the Google Pay Per Click Cost Estimator provides estimates for: Estimated daily clicks: The number of clicks your ads are likely to receive each day. Estimated average CPC: The expected cost per click for your selected keywords. Estimated daily cost: The total amount you’re likely to spend on your campaign each day. e. Bid Suggestions: The tool also suggests bid amounts for your chosen keywords to help you stay competitive in the auction and maximize your ad’s visibility. Benefits of Using the Google Pay Per Click Cost Estimator Now that we understand how the Google PPC Cost Estimator works, let’s explore its benefits and why advertisers should incorporate it into their campaign planning process. a. Budget Planning: The primary benefit of the PPC Cost Estimator is its ability to assist advertisers in setting realistic budgets. By providing estimated daily costs, it prevents overspending and helps advertisers allocate their resources effectively. b. Keyword Research: The tool aids in keyword research by suggesting bid amounts for different keywords. This information can guide advertisers in selecting the most cost-effective keywords for their campaigns. c. Performance Expectations: Advertisers can set realistic performance expectations using the estimated metrics provided by the tool. This ensures that they have a clear understanding of the potential outcomes of their PPC campaigns. d. Geotargeting Insights: For businesses targeting specific geographic locations, the PPC Cost Estimator offers insights into regional cost variations. This information is invaluable for businesses with regional marketing strategies. e. Competitive Advantage: Advertisers can use the bid suggestions to gain a competitive advantage in the auction. By bidding strategically, they can improve their ad’s position and visibility. How to Use the Google Pay Per Click Cost Estimator Effectively To make the most of the Google Pay Per Click Cost Estimator, follow these best practices: a. Thorough Keyword Research: Invest time in comprehensive keyword research to ensure you are targeting the most relevant and cost-effective keywords for your campaign. b. Experiment with Different Budgets: Use the estimator to explore various budget scenarios and their potential impact on your campaign’s performance. c. Monitor and Adjust: After launching your campaign, continuously monitor its performance and make adjustments based on real data. This will help you optimize your campaign for better results. d. Regularly Review and Update: Keyword competition and bid amounts can

What is the Google Pay Per Click Cost Estimator: A Comprehensive Guide A 2 Z Complete Info Read More »

How Can I Start Affiliate Marketing with No Money

How Can I Start Affiliate Marketing with No Money: A Comprehensive Guide with 12 tricks

How Can I Start Affiliate Marketing with No Money: A Comprehensive Guide with 12 tricks Many people wonder, “How can I start affiliate marketing with no money?” Fortunately, it’s possible to get started in affiliate marketing without a substantial upfront investment. In this comprehensive guide, we will explore various strategies and tactics to help you kickstart your affiliate marketing journey with little to no money. Affiliate marketing has become a popular way for individuals to earn a passive income online. The idea is simple: promote products or services from other companies, and when someone makes a purchase through your unique affiliate link, you earn a commission. do you also think “How Can I Start Affiliate Marketing with No Money?” Photo by Dylan Gillis on Unsplash Get Answer of ” How Can I Start Affiliate Marketing with No Money”   Understand the Basics Before diving into affiliate marketing, it’s essential to grasp the fundamentals. Affiliate marketing involves three primary parties: The Merchant or Advertiser: This is the company or business that offers products or services you will promote as an affiliate. The Affiliate Marketer: That’s you! You will promote the merchant’s products or services to your audience. The Consumer: The end-user who purchases the product or service through your affiliate link. Now that we’ve clarified the basics, let’s delve into how you can start affiliate marketing with no money . Choose a Niche You’re Passionate About Selecting the right niche is crucial in affiliate marketing. You’ll be more motivated and effective in promoting products or services you’re genuinely interested in. Consider your hobbies, interests, and areas of expertise when choosing a niche. Passion and knowledge about your niche can be your most valuable assets when you’re starting with limited funds. Research Affiliate Programs Once you’ve identified your niche, it’s time to find suitable affiliate programs. There are countless affiliate programs available, ranging from well-known brands to smaller companies. To find affiliate programs that align with your niche, you can: Search on Affiliate Networks: Websites like ShareASale, CJ Affiliate, and ClickBank offer a vast selection of affiliate programs across various niches. Check Companies Directly: Some companies have their affiliate programs, so visit their websites and look for an affiliate or partnership section. Use Search Engines: Perform a simple Google search with your niche keyword and “affiliate program” or “partner program” to discover opportunities. Join Affiliate Programs Once you’ve identified potential affiliate programs, sign up for them. Many affiliate programs are free to join, making them an ideal choice when you’re starting with no money. During the application process, some programs may ask about your promotional methods, so be prepared to explain how you plan to promote their products or services. Create Quality Content Content is the backbone of affiliate marketing. Without compelling content, it’s challenging to attract an audience and convince them to click on your affiliate links. Here are some content ideas to consider: Blog Posts: Start a free blog on platforms like WordPress.com or Blogger to create informative articles related to your niche. YouTube Videos: If you’re comfortable in front of the camera, create YouTube videos to review products, provide tutorials, or share your expertise. Social Media Posts: Utilize platforms like Instagram, Facebook, and Twitter to share engaging content and affiliate links. Remember to include your affiliate links strategically within your content. However, avoid spammy or aggressive promotion, as it can turn off your audience. Leverage Free Website Building Tools While a self-hosted website is a valuable asset in affiliate marketing, you can start without one. Platforms like WordPress.com, Wix, and Weebly offer free website-building tools. These platforms provide you with a basic online presence where you can publish your content and affiliate links. Optimize for SEO Search engine optimization (SEO) is essential for attracting organic traffic to your content. By optimizing your articles and videos for search engines, you can increase the visibility of your affiliate marketing efforts. Some free SEO tactics include: Keyword Research: Use free keyword research tools like Google Keyword Planner to find relevant keywords for your niche. On-Page SEO: Optimize your content with proper headings, meta descriptions, and keyword placement. Quality Backlinks: Build backlinks to your content by guest posting on other blogs or participating in niche-related forums and communities. you are reading “How Can I Start Affiliate Marketing with No Money” Utilize Social Media Social media platforms are powerful tools for promoting your affiliate products without spending money. Here’s how to make the most of them: Engage with Your Audience: Interact with your followers, respond to comments, and create engaging posts that encourage interaction. Share Valuable Content: Share your blog posts, videos, and affiliate links on your social media profiles. Use Hashtags: Research and use relevant hashtags to reach a broader audience. Email Marketing Building an email list is an effective way to promote affiliate products. While some email marketing services come with a cost, you can start with a free plan from services like MailChimp or SendinBlue, which allow you to send emails to a limited number of subscribers. Network and Collaborate Networking with other affiliate marketers or content creators in your niche can be invaluable. You can exchange ideas, learn from each other’s experiences, and potentially collaborate on projects. Building relationships in your niche community can lead to opportunities for mutual promotion, even without spending money.   Monitor Your Progress Tracking your affiliate marketing efforts is crucial to understanding what’s working and what needs improvement. Google Analytics is a free tool that can provide valuable insights into your website’s performance, including traffic sources and user behavior. Most affiliate programs also offer tracking tools that show clicks, conversions, and earnings. Be Patient and Persistent Affiliate marketing is not a get-rich-quick scheme. It takes time to build an audience, create valuable content, and start earning commissions. Be patient and persistent in your efforts, and don’t get discouraged if you don’t see immediate results. Conclusion   In conclusion, starting affiliate marketing with no money is entirely possible. By understanding the basics of your desire

How Can I Start Affiliate Marketing with No Money: A Comprehensive Guide with 12 tricks Read More »

How to Make Money on Shopify A Comprehensive Guide 7 Strategies

How to Make Money on Shopify: A Comprehensive Guide : 7 Strategies

How to Make Money on Shopify: A Comprehensive Guide :7 Strategies In this comprehensive guide, we will explore various strategies and tips to know How to Make Money on Shopify: that can help you achieve financial success on this popular e-commerce platform. In today’s digital age, making money online has become more accessible than ever, and one platform that has been a game-changer for e-commerce entrepreneurs is Shopify. With the right strategy and determination, you can build a successful online business and learn how to make money on Shopify. let’s know how to make money on Shopify image source : www.wallpaperflare.com How to Make Money on Shopify in 7 steps    Choose the Right Products The first and foremost step to make money on Shopify is selecting the right products to sell. Your product selection is the foundation of your online business, and it plays a pivotal role in determining your success. Here are some tips for choosing the right products: Passion and Knowledge: Start by considering your own interests and expertise. Selling products that you are passionate about or have knowledge of can make the process more enjoyable and authentic. Market Research: Conduct thorough market research to identify trending products and niches. Use tools like Google Trends, Amazon Best Sellers, and Shopify’s own product research tools to discover what’s in demand. Competitive Analysis: Analyze your competitors within your chosen niche. Identify gaps in the market or areas where you can offer unique products or a better customer experience. Profit Margins: Consider the profit margins of your chosen products. High-margin products can boost your profitability, but make sure there is enough demand to sustain sales. Create a Professional Shopify Store Once you’ve identified your niche and products, it’s time to create a professional Shopify store. Your store’s design, branding, and functionality are crucial for attracting customers and making sales. Here’s how to make your Shopify store stand out: Choose a Quality Theme: Shopify offers a wide range of themes, both free and paid. Select a theme that aligns with your brand and provides a seamless user experience. Customize Your Store: Personalize your store’s appearance by adding your logo, customizing colors, and creating an attractive homepage. A visually appealing store can make a positive impression on visitors. Optimize for Mobile: Ensure that your store is mobile-responsive. Many shoppers use smartphones for online shopping, so a mobile-friendly site is essential. User-Friendly Navigation: Make it easy for customers to find products and navigate your store. Use clear categories and a well-organized menu. Add High-Quality Content Content is king in the world of e-commerce. Creating valuable content can drive organic traffic to your store and help you make money on Shopify. Here’s how to use content effectively: Product Descriptions: Write detailed and persuasive product descriptions. Highlight the benefits and features of your products, and use high-quality images. Blogging: Start a blog on your Shopify store. Write informative articles related to your niche, addressing common problems or questions your target audience may have. SEO Optimization: Optimize your content for search engines by using relevant keywords. Use tools like Google Keyword Planner to find keywords with high search volumes. Customer Reviews: Encourage customers to leave reviews and testimonials. Positive reviews can build trust and credibility. Implement Effective Marketing Strategies To make money on Shopify, you need to drive traffic to your store and convert visitors into customers. Effective marketing strategies are essential for achieving this. Here are some marketing techniques to consider: Social Media Marketing: Create and maintain active social media profiles for your store on platforms like Facebook, Instagram, Twitter, and Pinterest. Share engaging content, run targeted ads, and engage with your audience. Email Marketing: Build an email list and send regular newsletters to your subscribers. Offer promotions, discounts, and exclusive content to incentivize sign-ups. Influencer Marketing: Collaborate with influencers in your niche to promote your products. Influencers can help you reach a wider audience and build trust with their followers. Paid Advertising: Use pay-per-click (PPC) advertising on platforms like Google Ads and Facebook Ads to drive targeted traffic to your store. Set a budget and carefully monitor your campaigns to maximize ROI. Content Marketing: Continuously create and share valuable content, such as how-to guides, tutorials, and product reviews. This can help establish your store as an authority in your niche. Optimize for Conversions Increasing your conversion rate is essential for maximizing your Shopify store’s revenue. Conversion rate optimization (CRO) involves making adjustments to your site to encourage more visitors to make a purchase. Here are some CRO strategies: Clear Call-to-Action (CTA): Use compelling and visible CTAs on product pages and throughout your site. Phrases like “Buy Now,” “Add to Cart,” and “Shop Now” can be effective. Streamlined Checkout Process: Make the checkout process as simple and efficient as possible. Reduce the number of steps and offer guest checkout options. Trust Signals: Display trust signals like secure payment icons, SSL certificates, and trust badges. These can reassure customers about the security of their transactions. Abandoned Cart Recovery: Implement an abandoned cart recovery system that sends automated emails to customers who leave products in their cart without completing the purchase. Offer Exceptional Customer Service Providing excellent customer service is crucial for building a loyal customer base and generating repeat business. Here are some tips for offering exceptional customer service on Shopify: Prompt Responses: Respond to customer inquiries and concerns promptly. Use Shopify’s customer support tools to manage communication efficiently. Easy Returns and Refunds: Make your return and refund policy clear and customer-friendly. A hassle-free returns process can build trust. Personalization: Personalize your interactions with customers whenever possible. Address them by name and offer tailored product recommendations. Feedback and Reviews: Encourage customers to leave feedback and reviews. Use their feedback to improve your products and services. Scale Your Business As your Shopify store starts to generate revenue, you can explore opportunities to scale your business and increase profitability. Here are some ways to scale your e-commerce venture: Add More Products: Expand your product range to cater to

How to Make Money on Shopify: A Comprehensive Guide : 7 Strategies Read More »

Blog Hosting

Blog Hosting: Choosing the Right Platform for Your Digital Voice: 6 Top Blog Hosting Providers

Blog Hosting: Choosing the Right Platform for Your Digital Voice: 6 Top Blog Hosting Providers  In this article, we will explore the ins and outs of blog hosting and guide you through the process of selecting the perfect platform to give your digital voice the platform it deserves. In today’s digital age, where information is at our fingertips and communication knows no bounds, starting a blog has never been more accessible or important. Whether you’re an aspiring writer, a business owner looking to expand your online presence, or someone with a passion to share, creating a blog can be your ticket to the vast online community. However, before you can dive into the world of blogging, you need to find the right hosting platform. What is Blog Hosting Before we delve into the different blog hosting options available, it’s essential to grasp the concept of blog hosting itself. In simple terms, blog hosting is a service that allows you to publish and maintain your blog on the internet. It’s like renting space on the web to store your blog’s files, making them accessible to anyone with an internet connection. Your choice of blog hosting provider will have a significant impact on your blog’s performance, security, and overall success. Types of Blog Hosting There are several blog hosting options available, each catering to different needs and preferences. Let’s explore the most common types: Free Blog Hosting: Pros: No cost, straightforward setup, ideal for beginners. Cons: Limited customization, less control, branded subdomains. Free blog hosting services like WordPress.com, Blogger, and Tumblr offer a simple way to get started. However, your blog will typically have a subdomain tied to the hosting platform (e.g., yourblog.wordpress.com), and you may have limited control over design and functionality. Shared Hosting: Pros: Affordable, suitable for small to medium-sized blogs, good for beginners. Cons: Limited resources, potential performance issues due to sharing server resources with other websites. Shared hosting is a budget-friendly option where multiple websites share the same server. It’s a reasonable choice for beginners or those with smaller blogs. Popular shared hosting providers include Bluehost, SiteGround, and HostGator. VPS Hosting (Virtual Private Server): Pros: More control and resources, better performance, scalable. Cons: Requires technical knowledge, higher cost than shared hosting. VPS hosting offers a dedicated virtual server within a shared environment. This option provides more control, flexibility, and improved performance. Providers like DigitalOcean, Linode, and Vultr are popular choices for VPS hosting. Dedicated Hosting: Pros: Full control over server, optimal performance, high security. Cons: Expensive, requires technical expertise for management. Dedicated hosting provides an entire server dedicated solely to your blog. It offers maximum control, performance, and security but comes at a premium price. This option is best suited for large blogs or websites with high traffic volumes. Managed WordPress Hosting: Pros: Optimized for WordPress, automatic updates, excellent support. Cons: Can be costly, limited to WordPress websites. If you plan to use WordPress as your blogging platform, managed WordPress hosting services like WP Engine and Kinsta are tailored to your needs. They offer optimized environments, automatic updates, and robust support specifically for WordPress users. image source : pexels Key Considerations for Choosing Blog Hosting Now that you’re aware of the different hosting options, it’s crucial to consider various factors when making your decision: Your Blog’s Goals: Begin by defining your blog’s purpose and goals. Are you blogging for personal enjoyment, to promote your business, or to generate income? Your objectives will influence the type of hosting you require. Budget: Determine how much you’re willing to invest in your blog hosting. Keep in mind that while free hosting options are available, they often come with limitations and lack the professional appearance of paid hosting. Technical Skills: Assess your technical proficiency. If you’re comfortable with server management and troubleshooting, options like VPS or dedicated hosting may be suitable. Otherwise, consider managed hosting for ease of use. Scalability: Think about your blog’s potential for growth. Will your traffic increase over time? Choose a hosting solution that allows for easy scalability to accommodate future needs. Performance: Website speed is crucial for user experience and SEO. Opt for hosting that offers sufficient resources and a strong track record of uptime and speed. Support: Consider the level of customer support you require. Some hosting providers offer 24/7 support, while others may have limited assistance hours. Security: Ensure your chosen hosting provider offers robust security measures to protect your blog from cyber threats and data breaches. Control and Customization: Determine how much control and customization you want over your blog’s design and functionality. Some hosting options provide more flexibility than others. Top Blog Hosting Providers To help you get started on your blogging journey, here are some reputable blog hosting providers worth considering: Bluehost: A popular choice for beginners, Bluehost offers affordable shared hosting plans with a free domain name and one-click WordPress installation. SiteGround: Known for its excellent customer support and high-performance hosting, SiteGround offers shared, cloud, and dedicated hosting options. HostGator: With a wide range of hosting plans, HostGator caters to various needs and budgets. They offer both shared and managed WordPress hosting. DigitalOcean: If you’re comfortable with server management, DigitalOcean’s VPS hosting provides great control and scalability, especially for tech-savvy bloggers. WP Engine: For WordPress enthusiasts, WP Engine specializes in managed WordPress hosting, offering optimized performance and top-notch security. InMotion Hosting: Known for its reliable service and excellent support, InMotion Hosting offers various hosting options, including shared, VPS, and dedicated hosting. Conclusion Choosing the right blog hosting platform is a critical step in your blogging journey. It impacts your blog’s performance, security, and overall success. Consider your goals, budget, technical skills, and other factors when making your decision. Whether you opt for a free platform to get started or invest in a premium hosting solution, the key is to ensure that your chosen hosting provider aligns with your blogging aspirations. With the right hosting in place, you can focus on what truly matters – creating valuable content and sharing your

Blog Hosting: Choosing the Right Platform for Your Digital Voice: 6 Top Blog Hosting Providers Read More »

Cloning HDD

Cloning HDD: Your Ultimate Guide to Data Migration and Backup- with 5 valuable tips

Cloning HDD: Your Ultimate Guide to Data Migration and Backup- with 5 valuable tips In this comprehensive guide, we’ll explore the ins and outs of cloning HDD, demystifying the process and helping you make informed decisions to protect your valuable data. In the fast-paced world of technology, data is the lifeblood of businesses and individuals alike. Whether it’s your cherished family photos, critical work documents, or your entire operating system, losing data can be devastating. That’s where Cloning HDD comes to the rescue. Cloning HDD is a powerful and essential process for safeguarding your data, upgrading your storage, or ensuring business continuity. image source : pixabay What is HDD Cloning ? Cloning HDD, short for Hard Disk Drive cloning, is the process of duplicating the entire contents of one hard drive onto another. This replication includes the operating system, applications, files, and data structure, ensuring that the target drive becomes an exact replica of the source drive. This technique is particularly valuable in various scenarios: 1. Data Backup and Recovery: Accidents happen. Your hard drive might crash, get infected with malware, or become physically damaged. If you’ve created a clone of your HDD beforehand, you can easily restore your system and data to its previous state, minimizing downtime and data loss. 2. Upgrading Storage Capacity: As data accumulates over time, you may find yourself running out of space on your current hard drive. Cloning allows you to transfer everything to a larger HDD or even a more modern SSD (Solid State Drive) without the hassle of reinstalling your operating system and applications. 3. System Migration: When you purchase a new computer or decide to switch to a different operating system, you can clone your existing HDD onto the new system. This process ensures a seamless transition, preserving all your settings and files. 4. Disaster Recovery Planning: For businesses, Cloning HDD is a vital component of disaster recovery planning. Having cloned HDDs ready as backups can save an organization from catastrophic data loss in the event of hardware failure or a natural disaster. Now that you understand what Cloning HDD is and why it’s important, let’s delve into the steps involved in the process. Process of Cloning HDD Cloning HDD may seem like a complex task, but with the right tools and guidance, it becomes a straightforward procedure. Here’s a step-by-step breakdown of how to clone an HDD: 1. Prepare Your Tools: To clone an HDD, you’ll need the following tools and equipment: Source HDD: The drive from which you want to clone data. Target HDD/SSD: The destination drive where you’ll copy the data. Cloning Software: Choose reliable cloning software such as Clonezilla, EaseUS Todo Backup, Acronis True Image, or Macrium Reflect. Some of these tools offer free versions with essential features. A USB Adapter or Dock: This is needed to connect your target drive to your computer if it doesn’t fit internally. 2. Backup Your Data (Optional): Before you begin the cloning process, it’s wise to back up any critical data on your source drive. While cloning is generally safe, there’s always a small risk of data loss during the process. 3. Connect Target Drive: If your target drive is an external HDD or SSD, connect it to your computer using the USB adapter or dock. Ensure it’s recognized by your operating system. 4. Install and Launch Cloning Software: Install the chosen cloning software on your computer and launch it. Most cloning tools have user-friendly interfaces that guide you through the process. 5. Select Source and Target Drives: Within the cloning software, select the source drive (your existing HDD) and the target drive (the one you want to clone to). Be cautious to choose the correct drives to avoid data loss. 6. Choose Cloning Method: Depending on the software you’re using, you’ll have different cloning methods to choose from: Full Disk Clone: This method clones the entire source drive, including the operating system and all data. Partition Clone: You can select specific partitions to clone, useful if you only want to copy certain data. 7. Start the Cloning Process: Once you’ve configured your settings, initiate the cloning process. This may take some time, depending on the size of your source drive and the speed of your hardware. 8. Verify Cloning Success: After the cloning process completes, verify that the target drive contains all your data and that it’s bootable if you cloned your operating system. 9. Swap Drives (If Necessary): If you cloned your system drive and plan to replace the old drive with the new one, shut down your computer, swap the drives, and restart. Your computer should boot up from the new drive without any issues. 10. Test and Monitor: Test your system thoroughly to ensure that everything works as expected. Keep the old drive as a backup for some time before securely erasing it to protect your data. Tips for Successful Cloning HDD While Cloning HDD is a valuable technique, it’s essential to follow best practices to ensure a successful outcome: 1. Choose Reliable Cloning Software: Select a reputable cloning software with positive user reviews and a history of delivering reliable results. The software should also be compatible with your operating system and hardware. 2. Verify Compatibility: Make sure that the target drive you intend to clone to is compatible with your system in terms of size, interface (SATA, NVMe, etc.), and physical dimensions. 3. Backup Data: Though rare, cloning can sometimes result in data loss or corruption. Always back up critical data before initiating the process. 4. Keep the Original Drive: After successful cloning, don’t rush to dispose of the original drive. Keep it as a backup for some time to ensure everything is functioning correctly with the new drive. 5. Check for Firmware and Driver Updates: After swapping drives, check for firmware and driver updates for your new hardware. This can help improve performance and stability. Conclusion Cloning HDD is a powerful tool for safeguarding your data, upgrading your storage, or ensuring business continuity. By following the

Cloning HDD: Your Ultimate Guide to Data Migration and Backup- with 5 valuable tips Read More »

Part Time Jobs for Students Earning While Learning - 6 important tips

Part Time Jobs for Students: Earning While Learning – 6 important tips

Part Time Jobs for Students: Earning While Learning – 6 important tips Part Time jobs for students have emerged as a crucial means of achieving financial independence, gaining valuable work experience, and fostering personal growth. This post explores the various benefits of Part Time jobs for students and offers guidance on how to balance work and academics effectively. In today’s fast-paced world, where the cost of education continues to rise, students are increasingly seeking ways to supplement their income while pursuing their academic goals. image source : pexels  The Importance of Part Time Jobs for Students Part Time jobs for students are more than just a source of extra income. They offer a wide range of advantages that contribute to a student’s holistic development. Financial Independence: One of the most obvious benefits is financial independence. With the rising cost of tuition, textbooks, and living expenses, Part Time jobs provide students with the means to cover some of these costs. This financial autonomy can alleviate stress and reduce the burden of student loans. Practical Experience: Part Time jobs offer students the opportunity to gain practical, hands-on experience in various industries. This real-world experience can complement their academic learning, making them more competitive in the job market after graduation. Whether it’s working in a retail store, interning at a tech company, or waiting tables at a restaurant, students can develop valuable skills that will serve them well in their future careers. Time Management Skills: Juggling work and academics necessitates effective time management. Students with Part Time jobs learn how to prioritize tasks, meet deadlines, and strike a balance between their professional and academic responsibilities. These skills are not only essential for academic success but also for future career advancement. Networking Opportunities: Building a professional network is crucial for career growth. Part Time jobs often provide students with the chance to connect with professionals in their chosen field. These connections can lead to internships, mentorships, or even job offers upon graduation. Increased Confidence: Part Time Jobs for Students can boost a student’s self-esteem and confidence. They learn to interact with diverse groups of people, handle challenging situations, and adapt to new environments. These experiences help students grow as individuals and become more self-assured. Resume Enhancement: A well-rounded resume is essential for landing a job after graduation. Part Time jobs can help fill the gap in a student’s resume, demonstrating their work ethic, commitment, and versatility. Employers often look favorably upon candidates with Part Time work experience.   Balancing Work and Academics While Part Time jobs offer numerous benefits, students must learn to balance their work commitments with their academic responsibilities to maximize the advantages of both. Here are 6 important tips to help students strike a harmonious balance Create a Schedule: Develop a weekly schedule that outlines your class times, study sessions, work shifts, and personal activities. Stick to this schedule as closely as possible to ensure you allocate sufficient time to each area of your life. Prioritize Tasks: Identify your most critical tasks and assignments, and prioritize them accordingly. This will help you focus on what truly matters and avoid unnecessary stress. Effective Time Management: Make the most of your time by employing effective time management techniques. Use tools like to-do lists, calendars, and time-blocking to stay organized and ensure you meet your deadlines. Communicate with Employers: Maintain open and transparent communication with your employers. Let them know about your class schedules and exam periods in advance so they can accommodate your academic commitments when creating your work schedule. Utilize Resources: Many universities offer resources and support for students who work Part Time. Take advantage of academic advising, tutoring services, and time management workshops to help you succeed in both your job and your studies. Self-Care: Don’t forget the importance of self-care. Ensure you get enough rest, eat well, and find time for relaxation and social activities. A healthy work-life balance is crucial for your overall well-being. Conclusion Part Time jobs for students are more than just a means to earn money; they are a valuable tool for personal and professional growth. The benefits of financial independence, practical experience, improved time management skills, networking opportunities, increased confidence, and resume enhancement make Part Time work a worthwhile endeavor. By effectively balancing their work and academic responsibilities, students can unlock the full potential of Part Time jobs, setting themselves up for future success in both their careers and personal lives. So, if you’re a student looking to broaden your horizons and take control of your financial future, consider exploring the world of Part Time employment – it might just be the key to a brighter tomorrow. Friends, you have just read the post “ Part Time Jobs for Students: Earning While Learning – 6 important tips” we hope you will like this post. If yes then share it with your friends and keep visiting our website for more such posts. If you interested to read about Astrology & Hindu Religion : Click here  Also Read : Network Topologies: definition,types, classification,examples etc-A Comprehensive Guide Also Read : Database Management System (DBMS) in detail with it’s definition,types, classification,examples Also Read : Find My RAM: A simple method to know RAM of Computer Also read : Windows 11 vs Windows 10: A Comprehensive Comparison of the Two Operating Systems Also read :What is Bus in Computer Systems: Understanding Its Role in Data Transfer Also read :Computer Memory: An Introduction to Storing and Retrieving Data Health & Wellness Also Read : Heavy Periods after Pregnancy: Causes, Symptoms, and Management are explained in detail Also Read : Women’s Reproductive Health: Empowering Women through Knowledge and Care Also Read : Fatty Lower Abdomen No More: Secrets to a Trim and Toned Waistline

Part Time Jobs for Students: Earning While Learning – 6 important tips Read More »

MoneyPantry Get Paid to Write

MoneyPantry Get Paid to Write: Earn Money $50-$3000 per Blog Post from Your Passion for Writing

MoneyPantry Get Paid to Write: Earn Money $50-$3000 per Blog Post from Your Passion for Writing In this article, we will explore the exciting world of freelance writing, how to Earn Money $50-$3000 per Blog Post with MoneyPantry Get Paid to Write here you will know how to get started with MoneyPantry, and valuable tips to maximize your earnings. So, let’s dive in and discover how you can monetize your passion for writing with MoneyPantry Get Paid to Write! Are you passionate about writing and looking for ways to turn your skills into a source of income?  If so, MoneyPantry Get Paid to Write is the perfect opportunity for you! MoneyPantry, a reputable online platform, offers writers like you the chance to get paid for doing what they love – writing. What is MoneyPantry Get Paid to Write? MoneyPantry Get Paid to Write is a fantastic program that allows writers to showcase their talent and earn money in return. It’s an online platform that connects writers with various writing opportunities from different clients, companies, and websites. These opportunities can range from writing blog posts, articles, product reviews, to even creating social media content. As a writer, you can choose from a wide array of topics that align with your interests and expertise. Getting Started with MoneyPantry: To begin your journey with MoneyPantry Get Paid to Write, you’ll first need to sign up as a freelance writer on their website. Registration is simple, and all you need is an email address and a username to create your account. Once registered, you can start exploring the available writing gigs. Exploring Writing Opportunities: MoneyPantry offers a user-friendly dashboard that displays various writing gigs available at any given time. These opportunities are categorized based on the type of content and the payment offered. As you navigate through the platform, keep an eye out for the “MoneyPantry Get Paid to Write” tagline, indicating that you’re eligible for payment for your contributions. Writing Quality Content: The key to success with MoneyPantry Get Paid to Write is to consistently deliver high-quality content. Clients and readers alike appreciate well-researched, informative, and engaging articles. As you write, ensure that your content is free from grammatical errors and plagiarism, as this will increase your chances of getting more writing gigs in the future. Setting Realistic Goals: As you embark on your writing journey with MoneyPantry, it’s essential to set realistic goals for yourself. While the prospect of earning money for your writing is exciting, it’s crucial to recognize that building a steady income will take time and dedication. Set achievable targets and gradually work towards increasing your writing output and income. Utilizing SEO Techniques: In the digital age, search engine optimization (SEO) plays a vital role in driving traffic to websites and articles. Familiarize yourself with basic SEO practices, such as incorporating relevant keywords (like “MoneyPantry Get Paid to Write”) into your content naturally. This will help your articles rank higher in search engine results, increasing their visibility and earning potential. Networking and Building Connections: Networking is a crucial aspect of the freelance writing world. Engage with other writers, clients, and editors on the MoneyPantry platform. Building connections can open doors to new writing opportunities, collaborations, and long-term partnerships. Don’t hesitate to ask for feedback and guidance from experienced writers; their insights can be invaluable for your growth as a freelance writer. Managing Your Time Wisely: Freelance writing with MoneyPantry Get Paid to Write offers flexibility, allowing you to work from the comfort of your home and set your own schedule. However, it’s essential to manage your time wisely to ensure consistent productivity. Create a writing routine that suits your lifestyle, and dedicate specific time slots for writing tasks each day. Expanding Your Writing Niche: While it’s great to focus on your areas of expertise, consider diversifying your writing niche to attract a broader range of clients and opportunities. Experiment with different topics and styles, and discover new areas where your writing skills shine. This versatility will make you a sought-after writer, leading to increased earning potential. Writing Engaging Headlines: A captivating headline can make all the difference in attracting readers to your articles. Spend time crafting catchy and compelling headlines that entice readers to click and read your work. Remember to incorporate relevant keywords, including “MoneyPantry Get Paid to Write,” to enhance the visibility of your articles. Building a Writing Portfolio: As you gain experience with MoneyPantry Get Paid to Write, consider building a writing portfolio showcasing your best work. A portfolio is an excellent way to demonstrate your writing style, expertise, and versatility to potential clients. It can significantly boost your credibility as a professional writer, leading to more lucrative writing opportunities. Staying Updated with Trends: The writing landscape is ever-evolving, with new trends emerging regularly. Stay informed about current topics, industry trends, and popular niches to stay relevant in the competitive freelance writing market. Writing on trending subjects can attract more readers, increasing your potential earnings. Conclusion: MoneyPantry Get Paid to Write offers an exciting platform for aspiring writers to turn their passion for writing into a rewarding source of income. By consistently delivering high-quality content, networking with other writers, and staying updated with industry trends, you can maximize your earning potential on MoneyPantry. Remember, success in freelance writing requires patience, persistence, and continuous improvement. So, embark on this writing adventure with enthusiasm and dedication, and watch your passion for writing transform into a fulfilling and profitable career with MoneyPantry Get Paid to Write. Happy writing! Friends, you have just read the post “MoneyPantry Get Paid to Write: Earn Money $50-$3000 per Blog Post from Your Passion for Writing ” we hope you will like this post. If yes then share it with your friends and keep visiting our website for more such posts. If you interested to read about Astrology & Hindu Religion : Click here  …………………………… Technological Tips Also Read : Blog Hosting: Choosing the Right Platform for Your Digital Voice: 6 Top Blog Hosting Providers

MoneyPantry Get Paid to Write: Earn Money $50-$3000 per Blog Post from Your Passion for Writing Read More »

How to Transfer Music from Computer to iPhone

How to Transfer Music from Computer to iPhone: A Simple Guide of 9 steps

How to Transfer Music from Computer to iPhone: A Simple Guide of 9 steps in this post “How to Transfer Music from Computer to iPhone: A Simple Guide of 9 steps ” is very easy explained & very useful for us because now a days smartphones have become our go-to devices for listening to music on the go. While there are numerous music streaming platforms available, many of us still prefer to have our personal collection of music stored on our devices. If you have a collection of music on your computer that you want to transfer to your iPhone, you’re in the right place. In this post, we will walk you through a step-by-step guide on how to transfer music from your computer to your iPhone effortlessly. Photo by Walt Eyes on Unsplash let’s know the way How to Transfer Music from Computer to iPhone Step 1: Connect Your iPhone to the Computer The first step in transferring music from your computer to your iPhone is to establish a connection between the two devices. Use the USB cable that came with your iPhone to connect it to your computer. Ensure that both devices are powered on and properly connected. Once the connection is established, your computer should recognize your iPhone. Step 2: Launch iTunes or Finder To transfer music from your computer to your iPhone, you can use either iTunes (for Windows and macOS Mojave and earlier) or Finder (for macOS Catalina and later). Launch the respective application on your computer. Step 3: Authorize Your Computer Before proceeding further, it’s essential to authorize your computer to access your iPhone. This step is necessary to ensure a secure and seamless transfer of music. Follow the on-screen instructions in iTunes or Finder to authorize your computer. Step 4: Navigate to the Music Section In iTunes or Finder, navigate to the Music section. You should see your iPhone listed as a connected device. Click on it to access the device’s settings and synchronization options. Step 5: Choose the Music You Want to Transfer Now comes the exciting part: selecting the music you want to transfer from your computer to your iPhone. In the Music section, you will find various options, such as playlists, albums, and individual songs. You can either transfer your entire music library or select specific songs or albums to transfer. Tick the checkbox next to the music you wish to transfer. Step 6: Initiate the Transfer Once you have chosen the music you want to transfer, click on the “Sync” or “Apply” button to initiate the transfer process. This action will begin copying the selected music from your computer to your iPhone. The time it takes to transfer the music will depend on the size of the files and the speed of your computer’s USB connection. Step 7: Monitor the Transfer Process While the transfer is in progress, you can monitor its status in iTunes or Finder. You will see a progress bar indicating the percentage of music transferred. It is essential to keep your iPhone connected to the computer until the transfer is complete. Step 8: Eject and Disconnect Your iPhone Once the transfer is finished, you will receive a notification indicating that the process is complete. Now, it’s time to safely eject and disconnect your iPhone from your computer. In iTunes or Finder, locate the “Eject” or “Disconnect” button next to your device and click on it. Wait for the confirmation message before unplugging your iPhone. Step 9: Enjoy Your Music on Your iPhone Congratulations! You have successfully transferred music from your computer to your iPhone. You can now disconnect your iPhone from the computer and start enjoying your favorite tunes on the go. Open the Music app on your iPhone, navigate to your library, and explore the transferred music. Conclusion (How to Transfer Music from Computer to iPhone) In this post, we have provided you with a simple guide on How to Transfer Music from Computer to iPhone: A Simple Guide of 8 steps . By following these steps, you can effortlessly move your music collection to your iPhone and enjoy it wherever you go. Remember to establish a connection, authorize your computer, select the music you want to transfer, initiate the transfer process, and monitor its progress. Once the transfer is complete, eject and disconnect your iPhone from your computer. Now, sit back, relax, and revel in the joy of listening to your favorite music on your iPhone. Happy listening! Please note that the exact steps may vary slightly depending on your operating system version and the software you are using. Friends, you have just read the post “How to Transfer Music from Computer to iPhone: A Simple Guide of 8 steps ” we hope you will like this post. If yes then share it with your friends and keep visiting our website for more such posts. If you interested to read about Astrology & Hindu Religion : Click here  …………………………… Technological Tips Also read : Find My RAM: A simple method to know RAM of Computer Also read : Windows 11 vs Windows 10: A Comprehensive Comparison of the Two Operating Systems Also read :How to Go Viral on Instagram Reels: A Guide to Capturing Attention Also read :What is Bus in Computer Systems: Understanding Its Role in Data Transfer Also read :Computer Memory: An Introduction to Storing and Retrieving Data Also Read : What is Deep Learning, Key Concepts & Important 5 Applications of Deep Learning Also Read : Google Cloud AI: Shaping the Future of Intelligent Applications Also Read :Dark Web Secrets, it’s 4 main Characteristics, how can we access dark web & what is the dark web used for Health & Wellness Also Read : Heavy Periods after Pregnancy: Causes, Symptoms, and Management are explained in detail Also Read : Women’s Reproductive Health: Empowering Women through Knowledge and Care Also Read : Fatty Lower Abdomen No More: Secrets to a Trim and Toned Waistline Travel India  Also Read : Swaminarayan Akshardham Temple New Delhi- A

How to Transfer Music from Computer to iPhone: A Simple Guide of 9 steps Read More »

Find My RAM

Find My RAM: A simple method to know RAM of Computer 

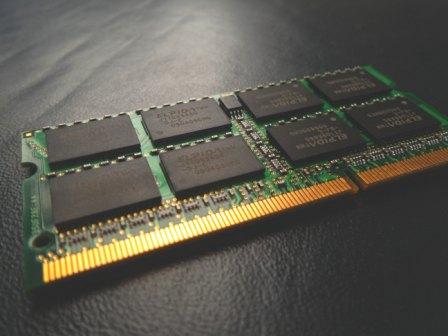
Find My RAM: A simple method to know RAM of Computer Friends whenever you face slow device’s speed problem then certainly you thinks how to find my ram to know how much RAM your computer has? RAM, or Random Access Memory, is a crucial component of your computer that affects its performance and multitasking capabilities. In this post, we will discuss how to find your RAM and explain its importance in simple terms. How to find my ram  the easiest way find is to follow these steps Click on the “Start” button located at the bottom left corner of your desktop screen. In the search bar, type “System Information” and click on the corresponding result. A window will open with detailed information about your computer. Look for the “Installed Physical Memory (RAM)” section. There, you will find the total amount of RAM installed on your computer. Now that you know how to find your RAM, let’s understand what RAM is and why it is important. RAM is a type of computer memory that stores data and instructions that the computer’s processor needs to access quickly. It is like the computer’s short-term memory, allowing it to read and write data at high speeds. When you open applications or run programs on your computer, they are loaded into RAM to ensure fast and efficient execution. Having an adequate amount of RAM is essential for smooth performance. It allows you to run multiple programs simultaneously without experiencing a significant slowdown. If you have insufficient RAM, your computer may become sluggish or unresponsive when trying to handle too many tasks at once. RAM comes in different sizes, typically measured in gigabytes (GB) or terabytes (TB). The more RAM you have, the more data your computer can store for immediate access. It provides a temporary working space for the CPU to quickly retrieve and process data. Importance of RAM The importance of having enough RAM becomes evident when you consider resource-intensive tasks such as gaming or video editing. These activities require a significant amount of memory to load and process large files and graphics smoothly. If you find that your computer struggles to handle such tasks, upgrading your RAM might be a good solution. In addition to finding your RAM size, you may also want to know the type of RAM your computer uses. Different generations of RAM, such as DDR3 or DDR4, have varying speeds and compatibility. Finding this information can help you determine if an upgrade is possible or necessary. To find the type of RAM in your computer, you can refer to the same “System Information” window mentioned earlier. Look for the “System Type” field, which will indicate whether your computer uses DDR3, DDR4, or any other type of RAM. Now that you have found your RAM size and type, you may be wondering if upgrading your RAM is beneficial. Upgrading your RAM can significantly improve your computer’s performance, especially if you regularly engage in memory-intensive tasks. If you find that your computer frequently slows down when you have multiple applications open or experiences delays when switching between programs, increasing your RAM can help alleviate these issues. It allows your computer to store more data in memory, reducing the need to access slower storage devices like hard drives or solid-state drives. When considering a RAM upgrade, it is essential to check your computer’s specifications and consult the manufacturer’s guidelines. Not all computers can support a significant increase in RAM, and it is crucial to ensure compatibility with your system. Additionally, upgrading your RAM may involve opening your computer’s case and installing new memory modules, so it is advisable to seek professional assistance if you are not familiar with the process. Conclusion you can say “find my RAM ” is a simple process that can help you understand your computer’s capabilities and determine if a RAM upgrade is necessary. RAM plays a vital role in your computer’s performance and multitasking abilities. By having sufficient RAM, you can ensure smoother operation, faster program execution, and a more responsive computing experience. Remember that finding your RAM size and type is just the first step. If you decide to upgrade your RAM, research your computer’s specifications, consult with professionals if needed, and choose memory modules that are compatible with your system. With an upgraded RAM, you can unlock the full potential of your computer and enjoy improved performance for various tasks. So, go ahead and find your RAM! Knowing this crucial piece of information will empower you to make informed decisions regarding your computer’s performance and take steps to optimize it for your needs. Friends, you have just read the post “Find My RAM: A simple method to know RAM of Computer ” we hope you will like this post. If yes then share it with your friends and keep visiting our website for more such posts. If you interested to read about Astrology & Hindu Religion : Click here  …………………………… Technological Tips Also Read : What is Deep Learning, Key Concepts & Important 5 Applications of Deep Learning Also Read : Google Cloud AI: Shaping the Future of Intelligent Applications Also Read :Dark Web Secrets, it’s 4 main Characteristics, how can we access dark web & what is the dark web used for Also Read Ethical hacking, difference between ethical hackers & malicious hackers, Is ethical hacking illegal? Also Read : What is a Computer: How Computer Works- An Easy Explanation  Also Read : What is the Internet? How internet works, A Beginner’s Guide to Understanding the World Wide Web, Health & Wellness Also Read : Heavy Periods after Pregnancy: Causes, Symptoms, and Management are explained in detail Also Read : Women’s Reproductive Health: Empowering Women through Knowledge and Care Also Read : Fatty Lower Abdomen No More: Secrets to a Trim and Toned Waistline Travel India  Also Read : Swaminarayan Akshardham Temple New Delhi- A Complete A to Z Tour Guide Also Read : Exploring the Golden Triangle in India: A Journey Through History and Culture Also Read : Best Travel Agencies in India:

Find My RAM: A simple method to know RAM of Computer  Read More »

How to Go Viral on Instagram Reels

How to Go Viral on Instagram Reels: A Guide to Capturing Attention

How to Go Viral on Instagram Reels: A Guide to Capturing Attention if you are also thinking of that how to Go Viral on Instagram Reels then this is the post for you , read  till the end & after reading definitely you will get the answer that how to Go Viral on Instagram Reels In today’s social media landscape, Instagram has emerged as one of the most popular platforms for sharing and discovering content. With its ever-growing user base, Instagram provides individuals and businesses with a fantastic opportunity to reach a wide audience. One of the key features that has gained immense popularity on Instagram is Reels. If you’re wondering how to go viral on Instagram Reels, this post will provide you with valuable tips and strategies to increase your chances of creating viral content. To understand how to go viral on Instagram Reels, it’s essential to grasp the nature of the platform and the factors that contribute to a post’s virality. Instagram Reels are short, engaging videos that capture attention and encourage interaction. These videos can be accompanied by music, effects, and creative edits to make them more appealing to viewers. The ultimate goal is to create content that resonates with users and prompts them to engage, share, and ultimately, help your content go viral. Photo by Jakob Owens on Unsplash so let’s know How to Go Viral on Instagram Reels   Create Eye-Catching Content: The first step in going viral on Instagram Reels is to create visually captivating content. Use vibrant colors, interesting visuals, and unique angles to grab the viewer’s attention within the first few seconds of your video. Experiment with different ideas and formats to find what works best for your niche and target audience. By producing visually appealing content, you increase the chances of viewers stopping their scrolling and engaging with your Reels. Tell a Story: Storytelling is a powerful tool that can captivate your audience and make your content more relatable. With Instagram Reels, you have a limited time frame, so it’s crucial to convey your message concisely. Whether it’s through humor, emotion, or educational content, focus on telling a story that resonates with your viewers. Connect with them on a personal level and evoke emotions that make them want to share your Reels with others. Utilize Trending Music and Effects: Instagram provides a vast library of music and effects to enhance your Reels. Keep an eye on the latest trends and popular songs that are making waves on the platform. Incorporating these trending elements into your content can help increase its visibility and appeal to a broader audience. By staying up to date with the latest trends, you can ride the wave of popularity and increase the chances of your Reels going viral. Engage with Your Audience: Building a strong connection with your audience is crucial for gaining traction on Instagram Reels. Respond to comments, answer questions, and encourage viewers to engage with your content. By actively engaging with your audience, you create a sense of community and encourage viewers to share your Reels with their followers. This increased engagement can boost the visibility of your content and improve its chances of going viral. Optimize Your Captions and Hashtags: Just like regular Instagram posts, captions and hashtags play a vital role in discoverability and virality. Craft engaging captions that complement your Reels and encourage viewers to take action, such as liking, commenting, or sharing. Research relevant hashtags that align with your content and are popular within your niche. Using the right combination of hashtags can help your Reels reach a wider audience and increase the chances of them going viral. Collaborate with Influencers: Collaborating with influencers in your niche can significantly boost the visibility of your Instagram Reels. Find influencers who have a substantial following and align with your content’s theme or target audience. By collaborating with influencers, you tap into their established fan base and gain exposure to a wider audience. This exposure can lead to increased engagement, shares, and ultimately, more potential for your Reels to go viral. Cross-Promote on Other Platforms: Don’t limit your content promotion to Instagram alone. Cross-promote your Instagram Reels on other social media platforms such as Facebook, Twitter, or TikTok. By sharing your Reels across multiple platforms, you increase the chances of reaching a diverse audience and attracting more viewers to engage with your content. Encourage your followers on other platforms to check out your Reels, comment, and share them, thus increasing their viral potential. Consistency is Key: Consistency is vital when it comes to gaining traction and going viral on Instagram Reels. Regularly post fresh, high-quality content to keep your audience engaged and coming back for more. Experiment with different types of content, but maintain a consistent style and theme that aligns with your brand or personal identity. By consistently delivering valuable content, you increase the chances of your Reels gaining momentum and going viral. Remember, going viral on Instagram Reels is a combination of creativity, strategic thinking, and audience engagement. It’s essential to understand your target audience, analyze the performance of your Reels, and adapt your strategies accordingly. Keep experimenting, learning from successful Reels, and refining your content creation process. With persistence and the right approach, you can increase your chances of creating viral content on Instagram Reels. Conclusion knowing how to go viral on Instagram Reels requires a combination of creativity, audience engagement, and understanding the platform’s dynamics. By creating eye-catching content, telling compelling stories, utilizing trending music and effects, engaging with your audience, optimizing your captions and hashtags, collaborating with influencers, cross-promoting on other platforms, and maintaining consistency, you can significantly increase your chances of going viral. Remember, viral success may not happen overnight, but by employing these strategies and continuously refining your approach, you can improve your chances of reaching a wider audience and achieving viral success on Instagram Reels Friends, you have just read the post “Find My RAM: A simple method to know RAM of Computer ” we

How to Go Viral on Instagram Reels: A Guide to Capturing Attention Read More »

Scroll to Top