How to disable comments in WordPress, Inserting Calling button, WhatsApp button, Automatic Chat, Sign Up Form
Contents
How to disable comments in WordPress, Inserting Calling button, WhatsApp button, Automatic Chat, Sign Up Form
WordPress is a powerful and popular content management system (CMS) that is used to create and manage websites. Here are some important features of WordPress that everyone should know:
let’s know some of these
How to disable comments in WordPress
In WordPress, you can disable comments either globally for your entire site or on a per-post/page basis. Here’s how you can do it:
Disable Comments Globally:
- Login to your WordPress Admin Dashboard:
- Navigate to
http://yourdomain.com/wp-admin/and log in.
- Navigate to
- Go to Settings:
- In the admin menu, go to
Settingsand click onDiscussion.
- In the admin menu, go to
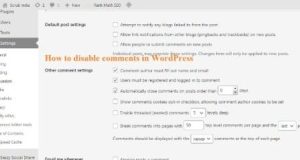
- Uncheck “Allow people to submit comments on new posts”:
- Under the “Default article settings” section, uncheck the option that says “Allow people to submit comments on new posts.”
- Save Changes:
- Scroll down and click on the “Save Changes” button.
Disable Comments on a Specific Post/Page:
- Edit the Post/Page:
- Go to the post or page where you want to disable comments.
- Find the Discussion Settings:
- Scroll down below the post/page editor, and you should see a “Discussion” box. If you can’t see it, click on the “Screen Options” at the top-right corner of the screen and make sure “Discussion” is checked.
- Uncheck “Allow Comments”:
- Within the “Discussion” box, uncheck the option that says “Allow comments.”
- Update/Publish:
- Update or publish the post/page to save your changes.
Disable Comments using Quick Edit:
- Go to All Posts or All Pages:
- In the WordPress admin menu, go to
PostsorPages(depending on whether you want to disable comments on a post or a page).
- In the WordPress admin menu, go to
- Quick Edit:
- Hover over the post/page title, and you’ll see options appear. Click on “Quick Edit.”
- Uncheck “Allow Comments”:
- Find the “Allow Comments” checkbox, uncheck it, and then click on the “Update” button.
*you are reading ” How to disable comments in WordPress”*
Remember, these instructions are based on the standard WordPress setup, and some themes or plugins may have additional settings or may handle comments differently. Always check your theme or plugin documentation if you can’t find the settings where expected.
Why two comment option is visible in WordPress , is this an error ?
In WordPress, having two comment options visible might not necessarily be an error. WordPress provides flexibility for website owners to choose between different commenting systems. The two most common commenting systems are:
- WordPress Comments: This is the default commenting system that comes with WordPress. When enabled, visitors can leave comments on your posts and pages. You can manage these comments through the WordPress dashboard.
- Third-Party Commenting Systems: Some users prefer to use third-party commenting systems such as Disqus or Facebook Comments. These systems offer additional features and may integrate social media logins. If you’ve installed a plugin that adds a third-party commenting system, it might appear alongside the default WordPress commenting system.
If you see two comment options, it’s possible that both the default WordPress comments and a third-party commenting system are active on your site. To resolve this:
- Check your WordPress Settings: Go to the WordPress dashboard, navigate to “Settings” > “Discussion,” and make sure that the default WordPress comments are enabled or disabled based on your preference.
- Check Plugins: If you’ve installed a commenting plugin, go to the “Plugins” section and ensure that only one commenting system is active.
- Theme Settings: Some WordPress themes come with built-in comment systems or styles. Check your theme settings to see if there are options related to comments.
After making the necessary adjustments, you should see only one comment option on your posts and pages. If the issue persists, it might be worth investigating specific plugins or theme settings that could be causing the duplication.

How to put a calling button on WordPress website ?
Adding a call button to your WordPress website can be achieved in several ways. One of the common methods is to use a clickable phone link. Here’s a step-by-step guide:
Method 1: Adding a Clickable Phone Link
- Edit the Page/Post:
- Go to the WordPress dashboard.
- Navigate to the page or post where you want to add the call button.
- Switch to HTML Editor:
- In the page/post editor, switch to the HTML or Text view. You can usually find a tab for “Visual” and “Text” or “HTML” at the top-right of the editor.
- Insert the Phone Link:
- Add the following code at the appropriate location in your content:
html<a href="tel:+1234567890">Call Us Now</a>
Replace “+1234567890” with your actual phone number. The “tel:” prefix is recognized by browsers and mobile devices to initiate a phone call.
- Switch Back to Visual Editor:
- If you switched to the HTML editor, switch back to the Visual editor.
- Update/Publish:
- Save or update your page or post.
Now, visitors on mobile devices can click the link to initiate a phone call.
Method 2: Using a Plugin
You can also use a WordPress plugin to add a call button. Here are general steps:
- Install a Call Button Plugin:
- Go to the WordPress dashboard.
- Navigate to “Plugins” > “Add New.”
- Search for a call button plugin, such as “Click to Call Buttons.”
- Install and Activate the Plugin:
- Install the plugin and activate it.
- Configure the Plugin:
- Follow the plugin’s settings to configure the appearance and behavior of the call button.
- Add the Call Button:
- The plugin might provide a shortcode or widget that you can use to add the call button. Insert it into your desired location (page, post, widget area, etc.).
- Save/Update:
- Save or update your page or post.
Method 3: Theme Customization
Some WordPress themes come with built-in options for adding buttons, including call buttons. Check your theme’s documentation or customization options to see if there’s a specific way to add a call button.
Choose the method that best fits your needs and preferences. If you’re unsure, testing on a staging site before making changes to your live site is always a good practice.

How to put a WhatsApp button on WordPress website ?
To add a WhatsApp button to your WordPress website, you can follow these general steps. There are various plugins and methods available, but I’ll outline one popular and straightforward approach using a plugin:
- Install a WhatsApp Plugin:
- Log in to your WordPress admin dashboard.
- Go to “Plugins” > “Add New.”
- In the search bar, type “WhatsApp” and press Enter.
- Browse through the available plugins and choose one that suits your needs. A popular option is “Click to Chat” or “WP Social Chat.”
- Click “Install Now” and then activate the plugin.
- Configure the Plugin:
- After activating the plugin, you may need to go to its settings page. This is typically found under “Settings” or as a separate menu item on the left sidebar.
- Enter your WhatsApp number or the number you want to connect with. Some plugins may provide additional customization options like button styles and positions.
- Add the WhatsApp Button to Your Site:
- Depending on the plugin, you may need to insert a shortcode, use a widget, or enable the button through the settings.
- If using a shortcode, you can typically place it in a post, page, or directly in your theme files where you want the button to appear.
- Preview and Save:
- Preview your website to see if the WhatsApp button appears as expected.
- Save your changes.
Remember that the steps may vary slightly depending on the specific WhatsApp plugin you choose. Additionally, some themes might have built-in options for adding social buttons, including WhatsApp.
Here are a few popular WhatsApp plugins you can consider:
Always check the plugin documentation for any specific instructions or settings it may have.
how to put a Automatic Chat option on WordPress website ?
To add an automatic chat option to your WordPress website, you can use various plugins that provide live chat functionality. One popular option is to use a tool like Tawk.to or LiveChat. Here’s a general guide on how to set up automatic chat using Tawk.to:
Using Tawk.to:
Sign Up for Tawk.to:
Go to the Tawk.to website.
Sign up for a free account.
Create a Property:
After signing up, log in to your Tawk.to account.
Click on the “Admin” tab.
Click on the “+ Add Property” button to create a new property for your website.
Configure the Widget:
Once your property is created, go to the “Admin” tab and click on “Widget Code.”
Copy the provided widget code.
Install Tawk.to Plugin in WordPress:
In your WordPress dashboard, go to “Plugins” > “Add New.”
Search for “Tawk.to” and install the official Tawk.to Live Chat plugin.
Activate the plugin.
Paste Widget Code:
After activating the plugin, go to “Settings” > “Tawk.to” in your WordPress dashboard.
Paste the widget code you copied from Tawk.to into the appropriate field.
Save the changes.
Adjust Chat Settings (Optional):
Tawk.to provides customization options, so you can adjust settings like the chat widget’s appearance, behavior, and automated responses.
Test the Chat:
Visit your WordPress website to ensure that the live chat widget is appearing correctly.
You can also log in to your Tawk.to dashboard to test and manage chats.
By following these steps, you should have successfully added an automatic chat option to your WordPress website using Tawk.to. If you prefer a different live chat service, the process may be similar, but the specific steps would depend on the chosen plugin or service.
How to put a Registration or Sign Up Form on WordPress website with Automatic reply
To add a registration or sign-up form with automatic reply functionality to your WordPress website, you can use a combination of a form plugin and an email marketing service. Here’s a step-by-step guide using a free option:
1. Choose a Form Plugin:
- Contact Form 7:
- Install the “Contact Form 7” plugin from the WordPress Plugin Repository.
- Activate the plugin.
- Create a new form in Contact Form 7 by going to “Contact” > “Add New” in your WordPress dashboard.
- Use the available form tags to customize your form fields (e.g., Name, Email, etc.).
- Save the form.
2. Configure Email Settings in Contact Form 7:
- After saving the form, go to “Mail” tab in the form settings.
- Enter the recipient email address where you want to receive the registration details.
- Customize the email subject and message body.
- You can use form tags like
[your-name],[your-email], etc., to include user-submitted data in the email.
3. Set Up Automatic Reply:
- For an automatic reply, you may want to use another plugin or an email marketing service.
- A simple solution is to use the “Flamingo” plugin, which is developed by the same team as Contact Form 7. It stores submitted form entries in the WordPress database, allowing you to review them.
- Install and activate the “Flamingo” plugin from the WordPress Plugin Repository.
4. Integrate with Email Marketing Service (Optional):
- If you want more advanced features, including automatic replies, consider integrating a free email marketing service like Mailchimp.
- Create a free account on Mailchimp.
- Install and activate the “Mailchimp for Woo Commerce” plugin.
- Connect your WordPress site to your Mailchimp account.
- In your Contact Form 7 settings, you can add an additional Mailchimp tag to subscribe users to your Mailchimp list.
5. Place the Form on Your Website:
- Copy the short code provided by Contact Form 7.
- Create a new page or post on your WordPress site.
- Paste the short code into the page or post content.
6. Test the Registration Form:
- Visit the page where you placed the form.
- Submit a test registration to ensure that the form submission and automatic replies are working as expected.
By following these steps, you can create a simple registration or sign-up form with automatic reply functionality on your WordPress website using free options like Contact Form 7 and Flamingo. If you want to explore more features or different plugins, you may consider other alternatives based on your specific requirements.
Friends, you have just read the post “ How to disable comments in WordPress, Inserting Calling button, WhatsApp button, Automatic Chat, Sign Up Form“ we hope you will like this post.
If yes then share it with your friends and keep visiting our website for reading more such posts.
If you interested to read about Astrology & Hindu Religion : Click here
……………………………
Technological Tips
Also Read : Unleashing the Power of Content Monetization Platforms: A Comprehensive Guide with 5 major challenges
Also Read : How to Make Money from Social Media Marketing: 10 Proven Strategies
Health & Wellness
Also Read : Heavy Periods after Pregnancy: Causes, Symptoms, and Management are explained in detail
Also Read : Depression and Libido:Understanding the Impact of the Connection Between-5 complex links
Travel India
Also Read : Swaminarayan Akshardham Temple New Delhi- A Complete A to Z Tour Guide
you were reading *How to disable comments in WordPress, Inserting Calling button, WhatsApp button, Automatic Chat, Sign Up Form *