How to Increase WordPress Website Speed Through cPanel - 9 important facts

How to Increase WordPress Website Speed Through cPanel – 9 important facts

How to Increase WordPress Website Speed Through cPanel – 9 important facts Nowadays every blogger want to know ” How to Increase WordPress Website Speed Through cPanel”  because in  the fast-paced digital world, website speed is crucial. A slow website can lead to higher bounce rates, lower search engine rankings, and a poor user experience. For WordPress website owners, ensuring that your site loads quickly is essential. One of the most effective ways to optimize your website’s speed is by using cPanel, a popular control panel used by many web hosting providers. In this article, we will explore various techniques on how to increase WordPress website speed through cPanel, ensuring that your site is fast, responsive, and user-friendly. let’s know How to Increase WordPress Website Speed Through cPanel – 9 important facts Understanding the Importance of Website Speed Before diving into the specific steps to increase your website’s speed, it’s essential to understand why speed matters. Google and other search engines consider website speed as a ranking factor, meaning that faster websites tend to rank higher in search results. Additionally, users are more likely to stay on a website that loads quickly. A delay of just a few seconds can lead to frustration, causing users to leave your site and look elsewhere. Therefore, knowing how to increase WordPress website speed is vital for maintaining a competitive edge. 1. Optimize Images One of the primary culprits behind slow website loading times is large image files. High-resolution images can take longer to load, slowing down your website. To optimize your images: – Compress Images: Use cPanel’s built-in Image Manager to compress and reduce the size of your images without sacrificing quality. Smaller image files load faster, improving your site’s overall speed. – Use Proper Formats: Convert images to formats like JPEG or WebP, which offer better compression without compromising on quality. 2. Enable GZIP Compression GZIP compression is a method of compressing files before they are sent to the user’s browser. This reduces the file size and decreases the time it takes to load your site. Here’s how to increase WordPress website speed by enabling GZIP compression through cPanel: – Access cPanel: Log in to your cPanel dashboard. – Find the “Optimize Website” Tool: Navigate to the “Software” section and click on “Optimize Website.” – Enable Compression: Choose the option to compress all content and save the changes. This simple step can significantly improve your website’s loading time. 3. Leverage Browser Caching Browser caching stores static files (like CSS, JavaScript, and images) on a visitor’s local computer so that they don’t have to be reloaded every time the user visits your site. This can dramatically speed up load times for returning visitors. To enable browser caching: – Edit the .htaccess File: Use cPanel’s File Manager to locate and edit the .htaccess file in your WordPress root directory. – Add Caching Code: Insert the following code into your .htaccess file to set expiration times for different file types: ## EXPIRES CACHING ## <IfModule mod_expires.c> ExpiresActive On ExpiresByType image/jpg “access 1 year” ExpiresByType image/jpeg “access 1 year” ExpiresByType image/gif “access 1 year” ExpiresByType image/png “access 1 year” ExpiresByType text/css “access 1 month” ExpiresByType text/html “access 1 month” ExpiresByType application/pdf “access 1 month” ExpiresByType text/x-javascript “access 1 month” ExpiresByType application/x-shockwave-flash “access 1 month” ExpiresByType image/x-icon “access 1 year” ExpiresDefault “access 2 days” </IfModule> ## EXPIRES CACHING ## “` This will enable browser caching, helping to increase WordPress website speed. 4. Optimize Your Database A cluttered or bloated database can slow down your website. Regularly optimizing your database can lead to faster query execution times and improved site speed. Here’s how to increase WordPress website speed by optimizing your database through cPanel: – Use phpMyAdmin: Log in to cPanel and find the phpMyAdmin tool under the “Databases” section. – Select Your Database: Choose your WordPress database from the list. – Optimize Tables: Select all the tables, then click on the “Optimize Table” option from the dropdown menu. This will clean up unnecessary data and improve the performance of your website. 5. Minimize HTTP Requests Every time a user visits your site, their browser sends an HTTP request for each element (images, scripts, stylesheets, etc.) on the page. The more requests, the longer it takes to load the site. Minimizing HTTP requests is a crucial step in how to increase WordPress website speed: – Combine Files: Combine multiple CSS files into one and multiple JavaScript files into one. – Inline Small CSS and JavaScript: For small CSS and JavaScript snippets, consider inlining them directly into your HTML to reduce the number of requests. You can use cPanel’s File Manager to edit your theme files and combine or inline these resources. 6. Use a Content Delivery Network (CDN) A CDN distributes your website’s static files across a network of servers worldwide, ensuring that users can download files from a server geographically close to them. This reduces latency and improves load times. To implement a CDN: – Integrate with cPanel: Many hosting providers offer integration with popular CDNs like Cloudflare directly through cPanel. – Configure CDN Settings: After enabling a CDN, configure the settings to optimize delivery and caching of your site’s content. Using a CDN is an effective way to increase WordPress website speed, especially for a global audience. 7. Update PHP Version The version of PHP running on your server can have a significant impact on your website’s performance. Newer versions of PHP are more efficient and can process requests faster. To update PHP through cPanel: – Select PHP Version: In cPanel, go to the “Software” section and click on “Select PHP Version.” – Choose the Latest Version: If your site is compatible, select the latest stable PHP version and save your changes. Updating PHP can lead to noticeable improvements in speed and security. 8. Monitor and Manage Plugins While plugins can add functionality to your WordPress site, having too many or using poorly optimized plugins can slow down your site. Here’s how to increase WordPress

How to Increase WordPress Website Speed Through cPanel – 9 important facts Read More »

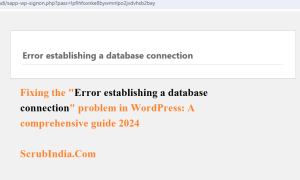
Fixing the Error establishing a database connection problem in WordPress A comprehensive guide

Fixing the “Error establishing a database connection” problem in WordPress: A comprehensive guide 2024

Fixing the “Error establishing a database connection” problem in WordPress: A comprehensive guide 2024 If you are a website owner or developer working with WordPress, encountering the dreaded “Error establishing a database connection” message can be frustrating. This error severs the connection between your site and its database, rendering your site inaccessible. But, don’t be afraid! In this comprehensive guide, we will explore the possible causes of this error and provide step-by-step solutions to get your website up and running again. The reason for the error Before diving into the solution, let’s understand why this error occurs. The “Error establishing a database connection” message indicates that WordPress cannot connect to the database that stores sensitive information such as posts, pages, and user data. A number of factors can cause this problem, from simple configuration errors to complex server or database issues. Common causes of Error establishing a database connection Incorrect database credentials Check your wp-config.php file to make sure the database name, username, and password are correct. Make sure these credentials match the information on your hosting provider’s dashboard. Database corruption Database corruption can occur due to various reasons such as server crashes or incomplete updates. Database maintenance can help prevent corruption cases. You can do this with a tool like phpMyAdmin or by adding a line of code to your wp-config.php file. Database quota completed Make sure your database has not reached the storage limit. Fix redundant data or consider upgrading your hosting plan to accommodate more data. Server Problems Make sure your database server is running. If not, start again. Verify the server logs for possible issues that could affect the database connection. Incorrect database host information Confirm that the host information in your wp-config.php file is correct. Usually it is set to ‘localhost’, but some hosting providers may use a different value. Conflicting plugin or theme Solve conflicts by disabling plugins and switching to a custom WordPress theme (like Twenty Twenty-One). Once the error is fixed, reactivate the plugins and themes in order to find the culprit. Step by step solution See the database credentials Open your wp-config.php file and confirm your database name, username, and password. Fix the corrupted database Use phpMyAdmin or add the following line to your wp-config.php file: phpCopy the code define(‘WP_ALLOW_REPAIR’, true); Go to http://yourdomain.com/wp-admin/maint/repair.php and follow the repair steps. Now, don’t forget to remove the line from wp-config.php. Database quota verification Check your hosting provider’s dashboard to see if you use database storage. Fix redundant data or consider upgrading your hosting plan. Restart the database server If you have access to the server, restart the database server. Check the server logs for any problems affecting the database. Confirm the database host Verify that the database host information in wp-config.php is correct. If you are unsure, contact your hosting provider. Troubleshoot plugins and themes Turn off all plugins and switch to the default WordPress theme. Slowly re-enable plugins and themes, checking for errors after each activation. This identifies the cause of the problem. conclusion Facing the “Error establishing a database connection” in WordPress can be intimidating, but armed with the knowledge of possible causes and solutions, you can successfully troubleshoot the problem and fix the issue Remember to hit you secure the website before major changes, if all else fails, your hosting provider or qualified developer Do not hesitate to get help with patience and careful research and your WordPress site will be back online in a short period of time. Also read : Power of Wix Website Designers: Crafting Stunning Digital Spaces 2024 Friends, you have just read the post “ Fixing the “Error establishing a database connection” problem in WordPress: A comprehensive guide“ we hope you will like this post. If yes then share it with your friends and keep visiting our website for reading more such posts. If you interested to read about Astrology & Hindu Religion : Click here  …………………………… Technological Tips Also Read : Unleashing the Power of Content Monetization Platforms: A Comprehensive Guide with 5 major challenges Also Read : How to Make Money from Social Media Marketing: 10 Proven Strategies Health & Wellness Also Read : Heavy Periods after Pregnancy: Causes, Symptoms, and Management are explained in detail Also Read : Depression and Libido:Understanding the Impact of the Connection Between-5 complex links Travel India  Also Read : Swaminarayan Akshardham Temple New Delhi- A Complete A to Z Tour Guide * you were reading :  Fixing the “Error establishing a database connection” problem in WordPress: A comprehensive guide

Fixing the “Error establishing a database connection” problem in WordPress: A comprehensive guide 2024 Read More »

How to Create a Website Template A 10 Steps Comprehensive Guide

How to Create a Website Template : A 10 Steps Comprehensive Guide

How to Create a Website Template : A 10 Steps Comprehensive In this post, we will delve into the world of website templates and guide you on how to create a website template that suits your needs. In today’s digital age, having an online presence is essential for businesses, individuals, and organizations. Creating a website is the first step towards establishing that presence, and one effective way to streamline the process is by using website templates. Website templates offer a quick and cost-effective solution for building a professional and visually appealing website.   Understanding Website Templates Before we dive into the process of creating website templates, let’s first understand what they are. A website template is a pre-designed layout that serves as a foundation for building a website. It includes the overall structure, design, and sometimes even content placeholders. Website templates are created to be easily customized, allowing you to add your own content and branding elements. The Benefits of Using Website Templates There are several advantages to using website templates: Time Efficiency: Website templates save you a significant amount of time as they eliminate the need to design a website from scratch. You can get your site up and running much faster. Cost-Effective: Creating a custom website can be expensive. Website templates are usually affordable and sometimes even free, making them a budget-friendly option. Professional Design: Most website templates are designed by professionals, ensuring that your website looks visually appealing and modern. Customization: While website templates provide a foundation, you can customize them to match your brand and preferences. Consistency: Website templates offer a consistent layout and design throughout your site, which can enhance user experience. Steps to Create a Website Template Now that we understand the benefits of using website templates, let’s explore how to create one. Step 1: Define Your Purpose and Audience Before starting to create a website template, it’s crucial to define your website’s purpose and target audience. Understanding your goals will help you design a template that aligns with your objectives. Step 2: Research and Inspiration Research is a key step in the template creation process. Look for inspiration by exploring websites that are relevant to your niche or industry. Take note of design elements, color schemes, and layouts that appeal to you. Step 3: Choose a Platform You’ll need a platform or content management system (CMS) to create your website template. Popular options include WordPress, Joomla, and Wix. Choose the platform that best suits your needs. Step 4: Plan the Layout Begin by sketching out the layout of your website. Consider the placement of headers, menus, content areas, and footer. This is where you’ll define the overall structure of your template. Step 5: Design the Template When it comes to designing your template, you have a few options: DIY Design: If you have design skills, you can create your template using design software like Adobe Photoshop, Illustrator, or online design tools like Canva. Use a Website Builder: Many website builders offer template design capabilities, allowing you to create your template within the platform. Hire a Designer: If design is not your strong suit, consider hiring a professional designer to create your template. Step 6: Include Essential Elements Ensure your website template includes essential elements, such as: Header with a logo and navigation menu. Content area with sections for text, images, and videos. Sidebar for additional information or widgets. Contact and footer sections. Step 7: Make it Mobile-Friendly With the increasing use of mobile devices, it’s crucial to create a responsive website template that looks great on all screen sizes. Test your template on various devices to ensure it’s mobile-friendly. Step 8: Add Styling and Branding Customize the template’s styling to match your brand. Incorporate your brand colors, fonts, and logo. Consistency in branding is key to building a strong online presence. Step 9: Test and Debug Thoroughly test your website template to identify and fix any issues. Check for broken links, missing images, and compatibility across different web browsers. Step 10: Documentation Create documentation that outlines how to use your template. This is especially important if you plan to distribute or sell your template to others. Distribution and Usage Once your website template is ready, you can choose to use it for your own website or distribute it for others to use. If you decide to share your template with a wider audience, consider these options: Marketplaces: You can sell your website template on online marketplaces like ThemeForest or TemplateMonster. Freemium Models: Offer a free version of your template with limited features and a premium version with additional features. Community Contributions: Share your template with the open-source community, allowing others to use and contribute to its development. Keeping Your Template Updated The digital landscape is constantly evolving, and it’s essential to keep your website template up to date. Regularly update it to ensure compatibility with the latest software versions, fix any bugs, and incorporate new design trends. Conclusion Going to Create a website template is an excellent way to streamline the website development process. Whether you’re building a website for personal use or planning to distribute templates to a wider audience, following the steps outlined in this guide will help you create a website template that is functional, visually appealing, and tailored to your specific needs. Website templates are a valuable tool for web designers, developers, and individuals who want to establish a strong online presence. By using them, you can save time, money, and effort while still achieving a professional and engaging website. So, take the plunge and create a website template that represents your brand and your online presence effectively. Friends, you have just read the post “ How to Create a Website Template : A 10 Steps Comprehensive Guide“ we hope you will like this post. If yes then share it with your friends and keep visiting our website for reading more such posts. If you interested to read about Astrology & Hindu Religion : Click here  …………………………… Technological Tips Also Read

How to Create a Website Template : A 10 Steps Comprehensive Guide Read More »

How to Archive a WordPress Site A 10 Steps Comprehensive Guide

How to Archive a WordPress Site: A 10 Steps Comprehensive Guide

How to Archive a WordPress Site: A 10 Steps Comprehensive Guide Whether you’re a blogger, a business owner, or a web developer, there may come a time when you need to archive a WordPress site. WordPress is a powerful and popular content management system that allows users to create and manage websites with ease. Archiving a site involves creating a backup of your website’s content, files, and databases for various reasons, such as safeguarding your data, moving to a new hosting provider, or preserving a historical record of your website’s content. In this post, we will explore the importance of archiving a WordPress site and provide a step-by-step guide on how to do it effectively. Why Archive a WordPress Site? Archiving a WordPress site is an essential process that offers several benefits. Let’s take a closer look at why you might consider archiving your WordPress site: Data Protection: Websites can be vulnerable to various threats, such as hacking, data loss, or server failures. By archiving your site, you ensure that you have a secure copy of your website’s content, ensuring data protection. Disaster Recovery: In the event of a catastrophic event or a website malfunction, having a recent backup will allow you to quickly restore your site to a previous state, minimizing downtime. Updates and Upgrades: Before making significant changes to your website, like updating themes, plugins, or the WordPress core, archiving the site provides a safety net. If anything goes wrong during the update process, you can easily roll back to the archived version. Migration: When you decide to change your hosting provider or domain name, archiving your site makes the migration process smoother and minimizes the risk of data loss. Historical Records: Some website owners may want to maintain a historical archive of their content for reference or auditing purposes. Archiving ensures that you have a record of your site’s content at various points in time. Legal Compliance: Depending on your industry and location, you may be required to retain historical records of your website. Archiving helps you comply with legal regulations. Now that we understand the Importance of archiving a WordPress site let’s delve into the steps to Archive a WordPress Site effectively. Step 1: Choose the Right Backup Solution To archive a WordPress site, you’ll need a reliable backup solution. There are various plugins and tools available that can simplify the backup process. Here are a few popular options: UpdraftPlus: UpdraftPlus is a user-friendly plugin that allows you to schedule automated backups of your site. It offers both free and premium versions with various features. BackupBuddy: BackupBuddy is a premium plugin that provides comprehensive backup and restoration options. It’s known for its reliability and ease of use. All-in-One WP Migration: This plugin is excellent for both backing up and migrating your site. It enables you to export your site’s data and import it elsewhere. cPanel: If you’re comfortable with server management, cPanel offers a manual way to create backups of your site’s files and databases. Choose the backup solution that best suits your needs and budget. Step 2: Install and Configure Your Backup Solution Once you’ve chosen a backup solution, install and activate it on your WordPress site. Most backup plugins will guide you through the initial setup process, which typically involves configuring backup frequency, storage location, and other settings. Ensure that your backup solution supports automated and scheduled backups, as regular backups are crucial for maintaining an up-to-date archive of your site. Step 3: Schedule Regular Backups To keep your archived WordPress site current, it’s essential to schedule regular backups. The frequency of backups depends on how frequently you update your website. If your site undergoes frequent changes, consider daily or weekly backups. If updates are less frequent, monthly backups may suffice. Step 4: Perform a Full Backup Before going to Archive a WordPress Site, perform a full backup, which includes all your site’s files and the database. Most backup solutions offer options for full backups, and it’s crucial to select this option to ensure that all your data is properly archived. Step 5: Store Backups Safely Where you store your backups is critical for the security of your archived WordPress site. There are several storage options to consider: Cloud Storage: Services like Google Drive, Dropbox, or Amazon S3 provide secure and easily accessible storage for your backups. On-site Storage: Storing backups on your web server is an option, but it’s not recommended because it won’t protect your data in case of server failure. Remote FTP: You can use FTP to transfer backups to a remote server or a different hosting provider for added security. Remember to encrypt your backups, use strong passwords for cloud storage accounts, and follow best practices for securing your backup files. Step 6: Verify Backup Integrity After each backup, it’s essential to verify the integrity of your backup files. Most backup solutions include a verification process to ensure that your backups are complete and free from corruption. Step 7: Test Restorations Periodically, it’s a good practice to test your backup files by performing a restoration on a separate test server or a local environment. Testing restorations helps you ensure that your archived site is functioning correctly and that you can rely on it when needed. Step 8: Maintain Documentation Creating documentation detailing your backup process, including the backup schedule and locations, is essential for efficient archiving. Keep records of when and where backups were stored and any changes made to your backup process over time. Step 9: Archive the Backup Files Now that you have an efficient backup system in place, you can consider your site effectively archived. By adhering to regular backup schedules, testing restorations, and maintaining proper documentation, you ensure the integrity and accessibility of your archived WordPress site. Step 10: Monitor and Update Archiving your WordPress site is not a one-time task but an ongoing process. You must monitor your backup system regularly, ensuring that backups are being created, stored correctly, and remain accessible. As your website

How to Archive a WordPress Site: A 10 Steps Comprehensive Guide Read More »

Understanding the Size of WordPress Featured Image A Comprehensive Guide A 2 Z

Understanding the Size of WordPress Featured Image: A Comprehensive Guide A 2 Z

Understanding the Size of WordPress Featured Image: A Comprehensive Guide A 2 Z When it comes to creating a visually appealing and user-friendly website, the size of WordPress featured image plays a crucial role. These images can significantly impact the overall aesthetics and performance of your website. In this comprehensive guide, we will delve into the importance of the size of WordPress featured images, how to optimize them, and the best practices for using them effectively. Why is the Size of WordPress Featured Image Important? Aesthetics and User Engagement The size of your WordPress featured image can greatly influence the aesthetics of your website. An appropriately sized featured image enhances the visual appeal of your content, making it more engaging to your visitors. When a user lands on your website and is greeted with high-quality, well-sized featured images, it can capture their attention and encourage them to explore your content further. Page Load Speed Page load speed is a critical factor in the user experience and SEO ranking. Oversized images can significantly slow down your website, leading to higher bounce rates and lower search engine rankings. By optimizing the size of your featured images, you can improve your site’s performance, ensuring that it loads quickly and efficiently. Responsive Design With the increasing use of various devices to access websites, responsive design has become a necessity. A well-sized featured image is essential for ensuring that your content looks good and functions properly on different screen sizes and resolutions. It adapts seamlessly to desktops, tablets, and mobile devices, enhancing the user experience. What are the Standard Size for WordPress Featured Image? WordPress offers several default image size for featured image. These standard sizes can be customized to fit your specific needs. The most commonly used default image sizes include: Thumbnail: Typically 150×150 pixels. Medium: Generally set to a maximum width of 300 pixels. Medium-Large: Usually 768×768 pixels. Large: Customarily set to a maximum width of 1024 pixels. You can access and adjust these image sizes from the WordPress dashboard by navigating to “Settings” > “Media.” Additionally, you can specify custom image sizes when uploading images to your media library. How to Change the Size of WordPress Featured Image Changing the size of WordPress featured images is a straightforward process. You can do it in a few different ways: Using the Media Settings Log in to your WordPress dashboard. Go to “Settings” and select “Media.” Adjust the dimensions for thumbnail, medium, medium-large, and large sizes. Click “Save Changes.” Using a PluginThere are several plugins available that can help you manage featured image sizes. One popular option is the “Regenerate Thumbnails” plugin. After installing and activating it, you can regenerate the thumbnail sizes for your existing images according to the new settings. Using Custom CodeIf you need to create custom image sizes, you can use code snippets in your theme’s functions.php file. Here’s an example of how to add a custom image size: phpCopy code if (function_exists(‘add_image_size’)) { add_image_size(‘custom-size’, 600, 400, true); } This code will create a new image size named ‘custom-size’ with dimensions of 600 pixels in width and 400 pixels in height. Optimizing WordPress Featured Images for Performance Image CompressionTo ensure that your featured images load quickly, it’s essential to compress them without sacrificing quality. WordPress provides an automatic image compression feature, which can be enabled by going to “Settings” > “Media” and adjusting the image quality slider. Lazy LoadingLazy loading is a technique that defers the loading of offscreen images until a user scrolls to them. This can significantly improve page load speed by reducing initial image loading times. Many modern WordPress themes and plugins offer lazy loading options. Image File FormatSelecting the right image file format is crucial. For photographs and images with gradients, use JPEG format. For images with transparency, like logos, use PNG format. The newer WebP format is also gaining popularity due to its superior compression and quality. Best Practices for Using WordPress Featured Images Consistency: Maintain a consistent aspect ratio for your featured images. This ensures that they appear uniform and professional throughout your website. Alt Text: Always add descriptive alt text to your images for accessibility and SEO. It helps search engines understand the content of your images and improves your website’s search ranking. Responsive Images: Utilize responsive images to ensure your website looks great on various devices. WordPress has built-in support for responsive images, which automatically serves the most appropriate image size based on the user’s device. Optimize for SEO: Ensure that your featured images are relevant to your content and include your target keywords in the image file name, alt text, and image title. Test Performance: Regularly test your website’s performance with tools like Google PageSpeed Insights or GTmetrix. These tools can help you identify any issues related to image size and loading speed. Conclusion The size of WordPress featured images plays a pivotal role in the overall success of your website. Whether it’s for aesthetic appeal, user engagement, or site performance, understanding and optimizing featured image sizes is essential. By following best practices and regularly reviewing your image settings, you can ensure that your website delivers a visually appealing and efficient user experience. Take the time to make the necessary adjustments to your featured images, and your website will thank you with improved aesthetics, faster loading times, and better SEO rankings. Friends, you have just read the post “ Understanding the Size of WordPress Featured Image: A Comprehensive Guide A 2 Z “ we hope you will like this post. If yes then share it with your friends and keep visiting our website for reading more such posts. If you interested to read about Astrology & Hindu Religion : Click here  …………………………… Technological Tips Also Read : Unleashing the Power of Content Monetization Platforms: A Comprehensive Guide with 5 major challenges Also Read : How to Make Money from Social Media Marketing: 10 Proven Strategies Health & Wellness Also Read : Heavy Periods after Pregnancy: Causes, Symptoms, and Management are explained in detail Also Read : Depression and

Understanding the Size of WordPress Featured Image: A Comprehensive Guide A 2 Z Read More »

Troubleshooting the Error Establishing a Database Connection in WordPress

Troubleshooting the “Error Establishing a Database Connection” in WordPress:  a 2023 Guide

Troubleshooting the “Error Establishing a Database Connection” in WordPress:  a 2023 Guide If you’ve ever worked with WordPress, you might have encountered the infamous “Error Establishing a Database Connection.” This error is a common issue that can leave website owners and developers scratching their heads. In this post, we will explore the various reasons behind this error and discuss effective methods for troubleshooting and resolving it. Understanding the Error The “Error Establishing a Database Connection” in WordPress is a message that appears when the application can’t connect to the database server. In simpler terms, it means that your website cannot retrieve the information it needs to function properly. This can be a frustrating experience, especially if your website serves a critical purpose, such as an e-commerce site or a blog. Common Causes of the Error Establishing a Database Connection Incorrect Database Credentials: One of the most frequent causes of this error is incorrect database credentials. This includes the database host, username, password, or database name. A small typo in any of these values can lead to the connection failure. Server Overload: High server load or traffic spikes can lead to server resources being exhausted. When the server is overwhelmed, it may struggle to establish a database connection, resulting in this error. Database Server Issues: Problems with the database server itself, such as downtime, corruption, or misconfiguration, can cause connection errors. Corrupted WordPress Files: If essential WordPress files are corrupted, it can hinder the connection to the database. This can occur due to a failed update or an incomplete installation. Plugins and Themes: Incompatibility or issues with specific plugins or themes can interfere with database connectivity. A faulty plugin or theme may trigger the error when activated. Incorrect wp-config.php Settings: The wp-config.php file contains critical database configuration settings. If these settings are incorrect, it can result in the error. Hacked Website: In some cases, a hacked website can disrupt the database connection. Malicious activities can alter the database settings, making it impossible to connect. Troubleshooting and Resolving the Error Establishing a Database Connection Check Database Credentials: The first step in troubleshooting this error is to review the database credentials in the wp-config.php file. Ensure that they match the details provided by your hosting provider. Pay special attention to typos and case sensitivity. Verify Database Server Status: Confirm if your database server is running correctly. Contact your hosting provider to check if there are any server-side issues or downtime. They can often help you resolve problems on their end. Examine Plugins and Themes: Temporarily deactivate all plugins and switch to a default theme like Twenty Twenty-One to see if the error persists. If it disappears, reactivate each plugin and theme one by one to identify the one causing the problem. Repair Corrupted Files: If you suspect corrupted WordPress files, you can attempt to repair them. Reinstall WordPress by overwriting the core files, ensuring you don’t delete your wp-config.php file and the wp-content directory where your themes and plugins are stored. Optimize the Database: An overly bloated database can slow down the connection process. You can optimize your database using plugins like WP-Optimize or phpMyAdmin to remove unnecessary data. Increase Server Resources: If your server resources are insufficient, consider upgrading your hosting plan or optimizing your website to reduce resource usage. You can also optimize your website’s performance by implementing caching mechanisms. Check for Malware or Hacks: Scan your website for malware using security plugins like Wordfence or Sucuri. If your website has been compromised, take immediate action to remove the malicious code and restore your database to a clean state. Restore from Backup: If all else fails and you have a recent backup, restoring your website to a previous working state can be an effective solution. Ensure that your backup doesn’t contain the same issue that caused the error. Conclusion The “Error Establishing a Database Connection” in WordPress can be a daunting issue, but with the right approach, it’s manageable and solvable. By carefully examining potential causes and applying the troubleshooting steps mentioned above, you can get your website back online and functioning correctly. Remember to regularly back up your website and keep it updated to prevent such errors in the first place. In summary, with patience and persistence, you can conquer this error and maintain a robust and reliable WordPress website. In conclusion, the “Error Establishing a Database Connection” in WordPress can be a daunting issue, but with the right approach, it’s manageable and solvable. By carefully examining potential causes and applying the troubleshooting steps mentioned above, you can get your website back online and functioning correctly. Remember to regularly back up your website and keep it updated to prevent such errors in the first place. In summary, with patience and persistence, you can conquer this error and maintain a robust and reliable WordPress website. Error Establishing a Database Connection can be frustrating, but with proper troubleshooting and the right fixes, you can quickly get your WordPress website back on track. By checking database credentials, ensuring the database server is running, examining plugins and themes, repairing corrupted files, optimizing the database, increasing server resources, checking for malware or hacks, and restoring from backup, you can address the issue effectively. So, the next time you encounter the “Error Establishing a Database Connection” in WordPress, don’t panic. Instead, follow the steps mentioned in this post, and you’ll be well-equipped to diagnose and resolve the issue, ensuring your website stays up and running smoothly. Friends, you have just read the post “ Troubleshooting the “Error Establishing a Database Connection” in WordPress:  a 2023 Guide  “ we hope you will like this post. If yes then share it with your friends and keep visiting our website for reading more such posts. If you interested to read about Astrology & Hindu Religion : Click here  …………………………… Technological Tips Also Read : Unleashing the Power of Content Monetization Platforms: A Comprehensive Guide with 5 major challenges Also Read : How to Make Money from Social Media Marketing: 10 Proven Strategies Health &

Troubleshooting the “Error Establishing a Database Connection” in WordPress:  a 2023 Guide Read More »

WordPress Customize Admin Dashboard  Transforming Your Website Management A 2023 Guide 

WordPress Customize Admin Dashboard : revealing hidden website management: a 2023 Guide 

WordPress Customize Admin Dashboard : revealing hidden website management: a 2023 Guide In this post, we’ll delve into the world of “WordPress customize admin dashboard” and explore ways to harness its potential. In the realm of website content management systems, WordPress stands out as the most popular and versatile platform for creating websites. Whether you are a seasoned developer or a novice, one of WordPress’s standout features is its capacity for customization to suit your needs. The admin dashboard, where you oversee your website’s content and settings, plays a pivotal role in your WordPress experience. Why we need WordPress Customize Admin Dashboard? The default WordPress admin dashboard provides all the essential tools for managing your website, but it may not always align perfectly with your workflow and preferences. Here are several compelling reasons to contemplate customizing your admin dashboard: 1.1 Tailored User Experience Customizing your admin dashboard empowers you to create a user-friendly and efficient workspace that caters to your specific needs. This can significantly boost productivity and make managing your WordPress site a more enjoyable experience. 1.2 Branding and Consistency If you’re developing a website for a client or your business, customizing the admin dashboard allows you to maintain brand consistency. You can personalize the dashboard’s appearance and features to match your website’s overall look and feel. 1.3 Enhanced Efficiency Customizing your admin dashboard can streamline your workflow. You can add shortcuts to essential tools, remove unnecessary widgets, and rearrange items to reduce the time it takes to complete tasks. 1.4 Strengthened Security By customizing your admin dashboard, you can enhance security by removing or restricting access to features that are not essential for your website’s operation. This can help reduce the potential attack surface for malicious actors. Customizing Your WordPress Admin Dashboard Now that we’ve established the importance of customizing the admin dashboard, let’s explore various methods and tools to personalize your workspace. In the context of “WordPress customize admin dashboard,” we will delve into several ways you can achieve this. WordPress Admin Themes One of the most straightforward ways to personalize your admin dashboard is by utilizing WordPress admin themes. Admin themes are tailored to replace the default WordPress admin interface with a fresh and stylish look. These themes are easy to install and can quickly give your dashboard a unique appearance. To find and install admin themes, follow these steps: Access your WordPress admin area. Navigate to “Appearance” > “Themes.” Click the “Add New” button. In the search bar, input keywords like “admin themes” or “dashboard themes.” Browse the available themes, and when you find one you like, click the “Install” button. After installation, click “Activate” to make the new admin theme the default for your dashboard. It’s important to note that admin themes may alter the dashboard’s appearance but not its functionality. For more in-depth customizations, you’ll need to explore other methods. Custom CSS For more advanced customization of your admin dashboard, you can employ custom CSS. Custom CSS allows you to apply your styles and layouts to various dashboard elements. Follow these steps to use custom CSS: Go to your WordPress admin area. Navigate to “Appearance” > “Customize.” In the customizer, locate an option like “Additional CSS” or “Custom CSS.” Click on it, and a text editor will open where you can enter your custom CSS code. By adding CSS code, you can modify elements such as backgrounds, fonts, colors, and more. This method offers precise control over your admin dashboard’s design. Admin Plugins WordPress is renowned for its extensive library of plugins, and you can find plugins designed specifically to help you customize your admin dashboard. Here are a few popular options: Admin Menu Editor: This plugin allows you to rearrange and customize the items in your admin menu, making it easier to access the most frequently used features. White Label CMS: White Label CMS enables you to rebrand your dashboard by changing the logo, text, and other elements to align with your branding. Ultimate Dashboard: This plugin empowers you to create a custom dashboard by adding widgets, reordering elements, and even incorporating a custom welcome panel for users. Using these plugins can simplify the process of customizing your admin dashboard, saving you time and effort. WordPress Widgets Widgets are modular content and functionality blocks that you can add to your admin dashboard. These widgets enhance your dashboard with essential information and shortcuts to key tasks. To access and customize widgets, follow these steps: Enter your WordPress admin area. Click on the “Screen Options” tab in the upper right corner of your dashboard. Select the widgets you want to display by checking the boxes. Widgets can display various types of information, such as recent comments, post drafts, and site stats. You can also add custom widgets or utilize third-party plugins to expand your widget options. Widgets offer a flexible way to enhance your dashboard’s functionality in the context of “WordPress customize admin dashboard.” User Roles and Permissions WordPress Customize Admin Dashboard isn’t solely about changing its appearance; it’s also about controlling who can access and modify specific features. WordPress provides a robust user role and permission system, allowing you to define what different user types can do within your admin dashboard. For instance, you can create custom user roles with specific permissions and capabilities. If you need to restrict access to certain dashboard features, you can use plugins like “User Role Editor” to fine-tune these settings. By defining roles and permissions, you can enhance security and ensure that your admin dashboard aligns with the needs of each user, whether they’re a contributor, editor, administrator, or a custom role you’ve established. Customizing the Admin Menu Another facet of “WordPress customize admin dashboard” is modifying the admin menu. The admin menu is the sidebar on the left that provides quick access to different sections of your WordPress dashboard. You can customize the admin menu using plugins like “Admin Menu Editor,” mentioned earlier. This plugin allows you to: Rearrange menu items: Change the order in which

WordPress Customize Admin Dashboard : revealing hidden website management: a 2023 Guide  Read More »

23 Common Challenges in WordPress Bug Fixing- A Developers Perspective

23 Common Challenges in WordPress Bug Fixing: A Developer’s Perspective

23 Common Challenges in WordPress Bug Fixing: A Developer’s Perspective WordPress bug fixing : WordPress is one of the most popular and user-friendly content management systems (CMS) worldwide, powering millions of websites. While it offers an extensive range of features and a user-friendly interface, WordPress developers often face several challenges related to “WordPress bug fixing.” In this post, we will delve into the major problems WordPress developers frequently encounter while troubleshooting and fixing bugs in WordPress websites. let’s know Common Challenges in WordPress Bug Fixing Plugin and Theme Compatibility Issues One of the most common challenges WordPress developers face is resolving issues related to plugin and theme compatibility. WordPress offers a vast ecosystem of themes and plugins, both free and premium, which can create conflicts and bugs when they interact with each other or the WordPress core. Developers often need to troubleshoot these conflicts and ensure that all elements work harmoniously. Broken or Missing WordPress Updates WordPress regularly releases updates to enhance security, performance, and functionality. However, sometimes these updates can result in unexpected bugs, especially when it comes to compatibility with various plugins and themes. Developers need to constantly monitor for updates, test them in a staging environment, and fix any issues that arise due to updates. White Screen of Death (WSOD) The dreaded “White Screen of Death” is a common problem in WordPress bug fixing. It occurs when a PHP error prevents the site from loading, resulting in a blank white screen. This can be challenging to diagnose as it offers no error message, and developers must go through various steps to identify and fix the underlying issue. Database Corruption and Optimization WordPress websites rely heavily on databases to store and retrieve content. Over time, the database can become corrupted or bloated with unnecessary data, leading to performance issues and bugs. Developers often need to optimize and repair the database to maintain website speed and stability. Security Vulnerabilities Security is a major concern for all website owners, and WordPress is no exception. Hackers often target WordPress sites, attempting to exploit vulnerabilities in themes, plugins, or the core software. Developers need to regularly patch security vulnerabilities, monitor for suspicious activities, and fix any security-related bugs that may arise. Malware and Hacked Websites Malware infections and hacked websites are significant concerns for WordPress developers. Malicious code injected into a WordPress site can lead to a wide range of issues, from defacement to data theft. Developers must diagnose the source of the infection, remove the malware, and secure the website to prevent future attacks. Performance Optimization WordPress websites can become sluggish and unresponsive due to various factors such as poorly optimized code, excessive plugins, and large media files. Developers often need to optimize the site’s performance, which can be a complex process involving various techniques like code minification, caching, and image optimization. 404 Errors and Broken Links 404 errors occur when a page or resource cannot be found, often due to broken links or misconfigured redirects & is a common problem in WordPress bug fixing. WordPress developers must identify and fix these errors to maintain a smooth user experience and ensure that visitors can access the content they expect. Custom Code Debugging Developers often work with custom code to implement specific features or functionality on a WordPress site. Debugging such custom code can be challenging, especially when there are no clear error messages. Developers need to meticulously review their code, identify issues, and make necessary fixes. Inadequate Testing Environments Testing is a crucial aspect of WordPress bug fixing. However, many developers face issues when their testing environment doesn’t accurately mimic the live site. Differences in server configurations, PHP versions, or database settings can lead to discrepancies, making it challenging to replicate and fix bugs effectively. Compatibility with Browser and Devices WordPress websites must be accessible and functional on various browsers and devices. Compatibility issues may arise if a site is not adequately tested across different platforms. Developers must address issues related to responsive design, CSS problems, and JavaScript conflicts to ensure a consistent user experience. Resource Overutilization Resource overutilization, such as high CPU or memory usage, can lead to poor website performance and, in some cases, server crashes. Developers need to identify the root causes of overutilization, which can range from poorly optimized code to excessive traffic, and fix the issues to maintain site stability. Issues with Page Builders Page builders are popular tools for creating visually appealing and complex page layouts in WordPress. However, they can introduce bugs, especially when updates or compatibility issues arise. Developers need to work on resolving issues related to page builders to ensure a seamless content creation experience for site owners. User Access and Permissions Issues related to user access and permissions can lead to problems in WordPress websites. These issues can range from users not being able to access certain parts of the site to accidental changes in permissions that disrupt the site’s functionality. Developers need to manage user roles and permissions effectively.user access and permissions is also common problem in WordPress bug fixing. Mobile Responsiveness In the era of mobile-first design, ensuring that a WordPress site is mobile-responsive is essential. Developers often face challenges related to mobile responsiveness, including layout issues, broken elements, or problems with touch interactions. Multilingual Websites For WordPress sites catering to an international audience, multilingual support is crucial. Developers need to address issues related to multilingual plugins and translations, ensuring that the site is user-friendly for non-English-speaking visitors. Broken Media and Images Images and media content are vital for engaging website visitors. Developers often encounter issues with broken images, failed uploads, or display problems that affect the overall user experience. These issues require timely fixing & these are common problems in WordPress bug fixing Search Engine Optimization (SEO) Issues SEO is a critical aspect of online visibility, and WordPress developers need to address SEO-related bugs. These can include problems with meta tags, URL structure, or canonicalization issues that affect a website’s search engine rankings. Third-party API Integration Many WordPress

23 Common Challenges in WordPress Bug Fixing: A Developer’s Perspective Read More »

Creating a Stunning WordPress Blog Page in Grid Layout A 2 Z Easy Explanation 

Creating a Stunning WordPress Blog Page in Grid Layout A 2 Z Easy Explanation 

Creating a Stunning WordPress Blog Page in Grid Layout A 2 Z Easy Explanation  In this post, we will delve into the world of WordPress and explore how you can create a captivating WordPress blog page in grid layout. So, let’s get started and learn how to master the art of displaying your blog posts in an eye-catching grid format. In the dynamic world of blogging and content creation, the presentation of your content can make a significant difference. One of the most effective ways to showcase your blog posts is by arranging them in an aesthetically pleasing grid layout. A well-organized grid layout not only enhances the visual appeal of your website but also improves user experience. Why WordPress? WordPress is an immensely popular content management system (CMS) known for its user-friendliness and versatility. It is the first choice for millions of bloggers and website owners worldwide. The beauty of WordPress lies in its ability to accommodate various themes, plugins, and customization options, making it ideal for creating a unique and captivating blog page in a grid layout. Choosing the Right Theme To create a WordPress blog page in grid layout, the first step is to choose an appropriate theme. Your chosen theme should not only support grid layout but also be visually appealing and responsive. A responsive theme ensures that your grid layout looks great on all devices, be it a desktop computer, tablet, or smartphone. When searching for a theme, consider using keywords like “grid layout” or “blog grid” in the WordPress theme repository to filter out the themes that suit your requirements. A popular choice is the Astra theme, which offers compatibility with numerous page builders and allows for easy customization. Installing and Activating Your Chosen Theme After you have found the perfect theme for your WordPress blog page in grid layout, the next step is to install and activate it. Here’s how to do it: Log in to your WordPress admin dashboard. Navigate to the “Appearance” section on the left sidebar. Click on “Themes.” Click the “Add New” button at the top of the page. In the search bar, enter the name of your chosen theme. Click “Install” once you find your theme. After the installation is complete, click “Activate” to set it as your active theme. How to create WordPress blog page in grid layout   Configuring Your Grid Layout With your grid-friendly theme activated, it’s time to configure the grid layout for your blog page. Many WordPress themes come with built-in customization options for grid layouts, making it relatively easy to set up. However, some themes may require additional plugins or custom coding. Let’s explore both approaches. Option 1: Using Built-in Theme Customization If your chosen theme offers built-in customization for grid layouts, you can follow these general steps: In your WordPress admin dashboard, go to “Appearance.” Look for a section like “Theme Options” or “Customizer.” Navigate to the “Blog Page” or “Layout” settings. Select “Grid” as your preferred layout style. Customize the number of columns, spacing between posts, and any other relevant settings. Save your changes. Option 2: Using Plugins for Getting WordPress Blog Page in Grid Layout If your theme lacks built-in grid layout customization, you can opt for a plugin to achieve the WordPress Blog Page in Grid Layout effect. One popular plugin is “Grid Layouts for Divi,” which works well with the Divi theme. Here’s how to use this plugin as an example: Install and activate the “Grid Layouts for Divi” plugin from the WordPress plugin repository. After activation, navigate to the plugin’s settings in your WordPress dashboard. Configure the grid layout options, such as the number of columns, post spacing, and style. Save your settings. By following these steps, you can easily set up a grid layout for your WordPress blog page, even if your theme doesn’t offer built-in grid customization. Populating Your Blog Page with Content With the grid layout in place, it’s time to populate your blog page with captivating content. Write and publish your blog posts, making sure they are accompanied by high-quality images and engaging titles. To ensure your grid layout remains visually appealing, consider maintaining consistency in the size and dimensions of your featured images. Customizing Grid Layout Styles To make your WordPress blog page in grid layout truly unique, you can further customize its style. You can adjust the font, color schemes, and other design elements to match your brand or personal preferences. Many themes and page builders offer user-friendly customization options for these elements. For even more control, you can use custom CSS to fine-tune the design. Adding Advanced Features Enhancing your grid layout blog page with advanced features can take it to the next level. Some popular features to consider include: Filterable Categories: Allow users to filter posts by category or topic, improving the navigation experience. Infinite Scroll: Implement infinite scroll, so users can seamlessly load more posts as they scroll down the page. Related Posts: Include a section at the end of each post that displays related content, encouraging readers to explore more. Social Sharing Buttons: Add social sharing buttons to make it easy for readers to share your content on their social media accounts. Author Bios: Display author bios to establish a personal connection with your readers. Comments and Engagement: Encourage user interaction by enabling comments and discussions on your blog posts. Optimizing for SEO In the world of blogging, search engine optimization (SEO) is paramount. A grid layout, when combined with proper SEO techniques, can help improve your website’s visibility and ranking on search engines like Google. When optimizing your WordPress blog page for SEO, consider the following: Keyword Optimization: Ensure that your blog posts contain relevant keywords, including the focus keyword “WordPress blog page in grid layout.” Meta Descriptions: Write compelling meta descriptions for your blog posts to entice users to click. Alt Text for Images: Use descriptive alt text for images to improve accessibility and SEO. Internal and External Links: Incorporate both internal links to

Creating a Stunning WordPress Blog Page in Grid Layout A 2 Z Easy Explanation  Read More »

Scroll to Top